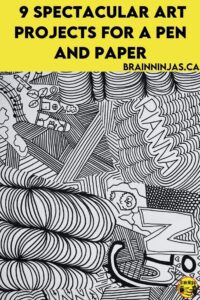
Quick art projects using only pen and paper are essential for busy elementary teachers. This post is especially for those who don’t consider themselves “art people” or who face budget constraints, classroom size limits or material shortages. Unlike complex art lessons requiring setup time and specialty supplies, these 9 projects can be done in 15–30 minutes with just a black Sharpie and printer paper. They’re classroom-tested, prep-free, and guaranteed to work in any upper elementary (grades 3–6) setting. Continue reading to learn more.
To be clear, all these projects use just a pen and paper. We tend to use a black fine-tipped Sharpie for a lot of our projects, but some projects turn out great if you use a coloured pen. Regardless of the pen you choose, these projects only use one pen (so one colour) and one piece of paper. Some of the projects are better if you have a ruler or straight edge (especially if you like straight lines).
Are you avoiding art because of the mess? You need to read this post: Are You Avoiding Teaching Art? How to Fix That.
| Project | Time | Difficulty | Best For | Materials |
|---|---|---|---|---|
| Zentangle | 20–30 min | Beginner | Focus & mindfulness | 1 pen, paper |
| Checkerboard Names | 30–45 min | Beginner–Intermediate | First day, community-building | Pencil + ruler |
| Handprints | 15–20 min | Beginner | Self-expression, contrast | 1 pen, paper |
| Patterns | 20–30 min | Beginner | Creative thinking | 1 pen, paper |
| Name Art | 15–25 min | Beginner | Name learning, first day | 1 pen, paper |
| Optical Illusion Dots | 20–30 min | Beginner–Intermediate | Precision, spatial reasoning | 1 pen, paper |
| Silhouette Art | 30–45 min | Intermediate | Contrast, light/shadow concepts | 1 black Sharpie, paper, light source |
| Name Doodles | 20–30 min | Beginner | Self-expression, personality | 1 pen, paper |
| Trading One Page | 20–30 min (+ rounds) | Beginner | Collaboration, spontaneity | 1 pen per student, paper |
Zentangle Art: A Mindfulness Drawing Project for Focused Learners
Zentangle is a drawing method that promotes concentration and creativity. There is a specific method. You can learn more about it on zentangle.com, which has a video and lots of ideas.
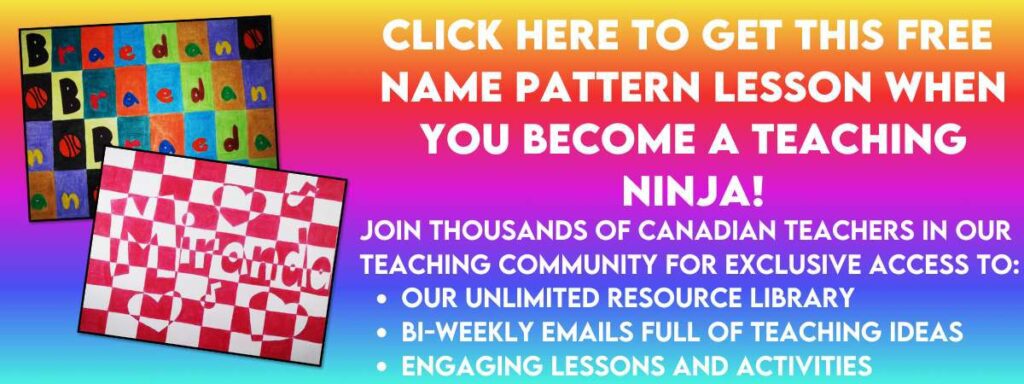
Checkerboard Names: A First-Day Art Activity for Building Classroom Community
You can get a complete copy of this lesson in our Resource Library. We can send a copy directly to your inbox when you sign up for our email list.
The instructions include using a pencil crayon (coloured pencil), but you can easily substitute a marker.
- Place the paper down in landscape style so the longer side is on the bottom. Write your name with very light whisper lines in bubble or block letters. Try to fill in as much of the page as possible. If there is extra space, you can draw simple icons or drawings. They need to stay simple for the project to work. Once the name is done, darken the lines just enough that they will be visible while working.
- Use your ruler to make vertical lines across your whole artwork. Keep them even by tracing the width of the ruler each time.
- Now, use your ruler to make horizontal lines across your whole artwork. Keep them even by tracing the width of the ruler each time. Now the whole paper is a checkerboard.
- This is where the tricky part starts. We recommend starting the colouring in one corner and working from there. Students who start in the middle usually get mixed up before too long. Once you start coming into contact with the name, alternate between coloured and not coloured spaces.
- We teach students to press firmly with pencil crayons. It will be all one colour and will use up most of the pencil crayon, so if you have extra or old pencil crayons, these are the ones to use for this project.
- Continue colouring each row, repeating the pattern until the whole page is complete.
Handprints: Teaching Positive & Negative Space in Minutes
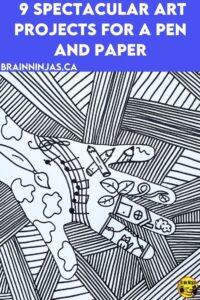
An easy pen and paper activity is having students trace their handprints. On the inside of the handprint, they can draw or doodle images, symbols, or patterns that are meaningful to themselves. Think of it a little like a map of things about the person. On the outside of the hand, students can draw random patterns or designs. This looks best if the inside of the hand and the outside have contrasting styles.
Explain that the space inside the handprint is positive space, and the space outside the handprint is negative space.
Patterns: A Creative Thinking Exercise Using Only Lines
- Cover the page in random lines that go in different directions. They can cross occasionally.
- Fill each of the spaces that are created with a different pattern. Try to make variations between straight and curved lines or different shapes.
We have a version of this project in our Winter Art Lessons. Students draw mittens and then cover them with patterns. Finally, they finish the page with watercolour paint. Find the Winter Art Lessons in our TpT Store ($USD) or BN Shop ($CAN).
Name Art: A Personalized Project Perfect for Name Learning
Using a pen and paper, have students write their names in block letters. They can use either lowercase or uppercase letters.
Draw a line around, outlining the entire name in a continuous line. Continue drawing the lines around the name repeatedly until the lines run completely off the outside edges of the page. As the lines get farther from the name, they will slowly lose the definition of the name.
If you use a smaller piece of paper (about the height of a sentence strip), they make great labels on student bins or lockers. If you really want to go fancy, students can use a different colour for each line as they trace.
This is a great project to do on the first day of school to help learn student names. If you’re looking for more back-to-school art projects, you might find this post perfect for you: Simple Art Projects for Back to School.
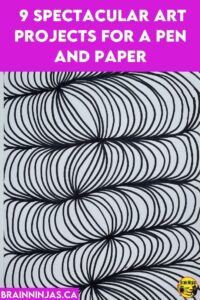
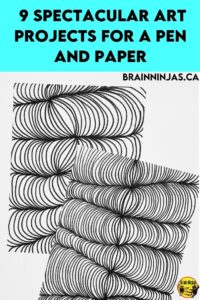
Optical Illusion Dots: An Intermediate Drawing Technique for Precision Practice
This creates a unique look. The more carefully students draw their curved lines, the better the result is.
- Place the page horizontally.
- Place 5 dots across the centre of the page horizontally. They should be spread out so they aren’t too close together, but they don’t need to be perfectly even or in a straight line.
- Link the dots together with alternating curved lines. So, connect Dot 1 to Dot 2 with an upward curve. Connect Dot 2 and Dot 3 with a downward curve. Continue across the page.
- Curve off the page from Dot 1 and Dot 5. This will make the line look like it travels all the way across the page.
- Make a second line connecting the dots in the same way. Continue doing this all the way off the page.
- Repeat this on both sides of the dots so that the whole page is covered.
Silhouette Art: Teaching Contrast and Light/Shadow Without Supplies
Students can create a silhouette of an object or person using a black Sharpie on white paper. This is a great project to teach students about contrast and negative space.
We used to use the overhead projector to get a great source of light, but a flashlight on a study surface works well. Students can work in partners if they are making a silhouette of themselves.
We had some students choose uniquely shaped objects to try to make interesting silhouettes.
You can also turn this into an interactive bulletin board. Have students make a silhouette and also take a photo of the object in the light. Place all the silhouettes and the photos on a bulletin board; all mixed up. People can try to match the photos to the silhouettes.
Name Doodles: Self-Expression Through Personality-Driven Doodling
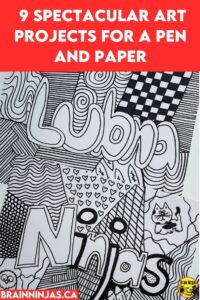
Students can draw their names in bubble or block letters across the middle of the page. They can place some lines dividing up the space behind the name. Students can fill up each of the sections with doodles or unique patterns showing a bit of their personality.
Trading One Page: A Collaborative Rapid Draw Activity for Groups
Place all your students in a circle with either desks or hard surfaces. Give them each a piece of paper and one marker. We have done this with a single black marker, as well as having students each use one colour. Either way works.
Set a timer for 30 seconds and tell students they can draw a picture.
At the end of the 30 seconds, everyone hands their page to the person on the right. Give them 30 seconds to draw again. They will add to the picture they’ve been given but can’t communicate what the picture was supposed to be. Continue this until the papers have gone all the way around the circle.
If you need less time, make the amount of drawing time a little less. For more time, have students “complete” their drawings when the paper they started with gets back to them.
If you want papers to land back in the right place, either have students write their names on them before starting or label one paper with a symbol on the back. When it gets to the position you want, you can end the activity.
Can I do these projects with kindergarten or grade 1?
Most of these projects (Handprints, Name Doodles, Patterns, Trading One Page) work for younger grades if you provide more guidance and reduce fine-motor expectations. Zentangle, Optical Illusion Dots, and Checkerboard Names are best for grades 3–6.
What pen should I use?
A black fine-tipped Sharpie (0.5–1mm) is ideal for most projects. Colored Sharpies, gel pens, or fine-tip markers also work. Avoid ballpoint pens, which may skip or tear thin paper.
How much time do I need for setup?
Zero. Hand out a pen and paper, and you’re ready to start. No prep, no material gathering.
Can I use these as a substitute for a missing lesson or indoor recess activity?
Absolutely. These projects are specifically designed for last-minute classroom use.
Do I need to teach the Zentangle “official” method?
No. Your students can follow the simplified instructions in this post. The official method (from zentangle.com) is optional if you want to add structure.
Which project is best for students who think they “can’t draw”?
Zentangle, Patterns, and Optical Illusion Dots don’t require realistic drawing skills. They rely on repetition and shape-filling instead.
Can I collect and grade these projects?
Yes. Use them to assess following directions, effort, completion, and creativity. They’re quick enough to grade during class or at lunch.
Are these projects correlated to curriculum outcomes?
Most align with elementary visual arts standards (composition, line, pattern, contrast, negative space). Silhouette Art teaches contrast and negative space explicitly. Name Art and Handprints connect to identity/community building in social-emotional learning.
Looking for more art ideas?
We have several posts that have more detailed art lessons.
Looking for More Art Ideas? Here’s Where to Start
Fast Art Projects (Like This One)
Art + Curriculum Integration
- How to Connect Social Studies and Art
- How to Explore Métis Storytelling Through Indigenous Art Lessons
Projects for Specific Times of Year
- Simple and Stunning Remembrance Day Art Projects
- How to Make Valentine’s Day Love Trees
- Heart Art Projects You’ll Love
Upcycled & Craft Projects
- How to Make Recycled Can Characters
- How to Make Recycled Cork Ornaments
- How to Make Christmas Wooden Ornaments
- Art Projects That Will Last All Year
Do you have a simple art project that only uses a piece of paper and a marker? We’d love to hear about it. Share it in the comments below.