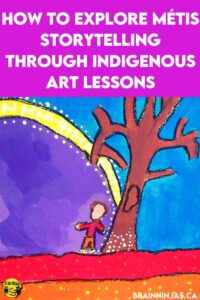
This is a lesson we’ve done with our students for years, partly because it never fails to create stunning artwork and partly because it’s fun to do. Students always love it. Artists always study the work of other artists to learn techniques. This art project celebrates Indigenous artists by studying and creating new works inspired by Indigenous art lessons.
Come check out how we create these stunning pieces of art (which aren’t nearly as difficult as you might think) based on Indigenous art lessons.
Books are a Great Way to Explore Indigenous Artists
If you look for them, there are many books out there illustrated by Indigenous artists in Canada. Their artwork is inspirational and many students connect with the illustrations of these books. It’s easy to weave the illustrations into art lessons.
Books written or illustrated by authors who identify as First Nations, Inuit or Métis often depict the oral traditional stories. These stories become invaluable in teaching non-Indigenous students about the belief systems of Indigenous people in a creative way. It allows Indigenous students to look at works that represent themselves and their families.
You can easily combine art and social studies! To read more about how we do that, check out this post. Art is one way we weave Indigenous culture into our classroom all year long. We have more information in this post: Bring Indigenous Culture into Your Lessons.
The following lesson comes from our Indigenous Artists in Canada Inspired Art Lessons. These art lessons were designed to look at the work of various artists and then create your own works of art. They do not contain templates or copies of the work as “inspired” artists look at work and then create their own pieces of art. Find the Indigenous Artists in Canada Inspired Art Lessons in our TpT Store ($USD) and BN Shop ($CAN).
We also have other inspired art lessons in our store. We try to create lessons that require common art supplies and can be done in most upper elementary classrooms.
Try One of Our Favourite Lessons Inspired by an Indigenous Artist
One of our most beloved books is by Leah Dorian. Her beautiful artwork is a favourite of our students. Every school we have moved to, we have re-bought this book so it can be in the school library. It’s called The Giving Tree: A Retelling of a Traditional Métis Story. If you aren’t able to get your hands on this book, you can also use the illustrations from My First Métis Lobstick: A Story of Métis Life During the Voyageur Fur Trade Days, also by Leah Dorian.
We do not use affiliate links and instead encourage you to reach out to your local bookstore. They might be able to bring it in for you, and you’d be supporting local businesses (which is always good).
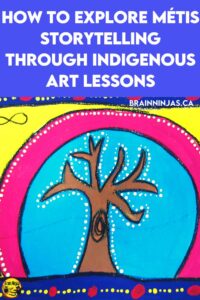
Read the story with your students and while reading, observe the artwork. What characteristics do each of the illustrations have in common? Our students notice bright colours and dots.
What do your students like about the images? How do they feel looking at them? How do the illustrations help with the story?
Ask students which elements they would include if they were going to make a painting of their own. Discuss the possibilities and the expectations.
Now you’re ready to recreate an illustration of your own.
If you’re avoiding painting because of the mess, we encourage you to read Are You Avoiding Teaching Art?
How to Create Your Painting
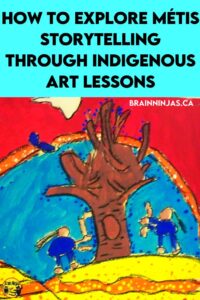
We have created a simple lesson plan you can use with your students below. It includes a list of materials, suggestions for teaching the different painting skills, and shows some examples. Find the free, printable, teacher-friendly version of this Metis-Inspired Art Project in our TpT Store ($USD) and BN Shop ($CAN).
First, draw with chalk
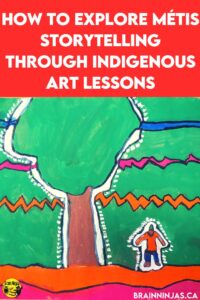
Draw out a simple picture using chalk on construction paper. This allows students to make changes without too much trouble. After using the book, we asked students to include a tree if possible in their piece. Keep the sections of the drawing big enough for a paintbrush and do not include any dots (those will get added later).
Paint with tempera
We use lots of bright colours to paint the image. This does not include the dots or the outline yet. Encourage your students to paint over the chalk so that colours touch and the chalk is no longer visible.
Outline
We use black pastel because it’s easy for the kids to use, but Sharpies or black paint with a fine brush could work as well.
Make dots
We tip the paintbrushes upside down and use the non-brush end dipped in paint to make the dots. We teach students to be deliberate about where the dots are (not just random spots). They sometimes outline an important feature or help the viewer see something specific. The dots should be in a bright contrasting colour.
Voila!
That’s it. Share your artwork with your friends.
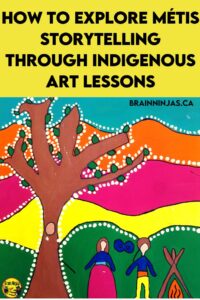
Over the years, we’ve tried everything from “let them go wild” to let’s recreate the story. One way that worked well was we wrote a sequence of the story and two students painted for each section. We lined the hall with the pieces of art and then students walked along the paintings to retell the story. If this works for you, try it. Of all the ways we’ve done this art, this was our favourite.
Another way to share the art is to photograph all of them and put them into a slide show. Students can then retell the story as the slides progress. If you have a screen recording program, this could be recorded to share with parents.
If you don’t have time for something elaborate, don’t worry. These works of art are so stunning that simply hanging them for others to view works very well. Parents usually ask for these to be kept safe because they would like to frame them. In fact, framing student artwork is a great gift for students. We bought frames one year and then students wrapped them and gave them as a gift for their next family holiday.
The images included in this post are just a few of the amazing pieces of art this lesson inspired. We have more included in our free lesson from TpT or our BN Shop, so be sure to download it so you’ll have more examples. It is part of a larger set of lessons featuring a variety of works inspired by Indigenous Artists. Find the Indigenous Artists of Canada Art Projects in our TpT Store ($USD) and BN Shop ($CAN).
We also have a set of inspired works by Canadian Artists. Find the Artists of Canada Art Projects in our TpT Store ($USD) and BN Shop ($CAN).
Looking for Other Activities?
If you are looking for another free art lesson, you might want to try our Pastel Poppy Corners. We designed it for Remembrance Day, but it could be modified to be used with any flower. It can be found in our Resource Library, or we can send you a copy when you sign up for our email list.
If you are looking for other ways to weave the culture of Indigenous People from Canada into your daily lessons, you might want to try learning about some of the games children played. The Bone Game is a simple game where your students can create their own pieces. Find it in our Resource Library, or we can send you a copy of the instructions for the Bone Game when you sign up for our email list.
Are you looking for other art-related posts?
Art Projects That Will Last All Year
Simple and Stunning Remembrance Day Art Projects
How to Create Memorable Remembrance Day Art Projects (these are even more)
Simple Art Projects for Back to School
How to Make Christmas Art Projects to Give
Simple Christmas Tree Projects We Love
In what ways do you combine art with other subject areas? Have you tried this project? Be sure to tag us on social media. On Instagram, we’re @brainninjastpt. We’d love to see what your students came up with! Let us know what has worked for you in the comments below.


Hi,
We moved the samples and put them into the actual teacher guide, but we must have forgotten to switch the link. We’ll look into that right away. 🙂
They’re back! Hopefully you find these pictures useful. 🙂
Hi there,
I am looking forward to doing this project! However in the teacher guide it refers to your website to look for more examples of the artwork and stages of the project. Just wondering where that is located?