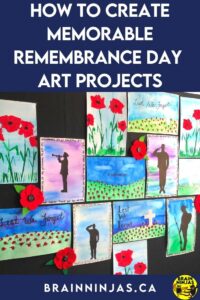
Each year, we spend a good chunk of time creating Remembrance Day art projects to decorate the halls of our school. Our Remembrance Day assembly often invites community members, so we like to have beautiful art to enjoy. There are always a lot of poppies. We wanted to create some pieces for upper elementary students that took a little more time and care to create but were not poppies.We took Remembrance Day beyond the poppy.
These are projects that can be created in class with basic art materials found in most schools. We actually teach students the basics of all the projects, and they choose two or three to make. We use different sizes of paper for the projects, It makes every piece of art a unique part of a collection. Students choose their two best pieces for the display in the hall and we keep the rest in our classroom until all the work is sent home.
If you are avoiding painting projects because you feel they are too messy, you need to read our post: Are You Avoiding Teaching Art?
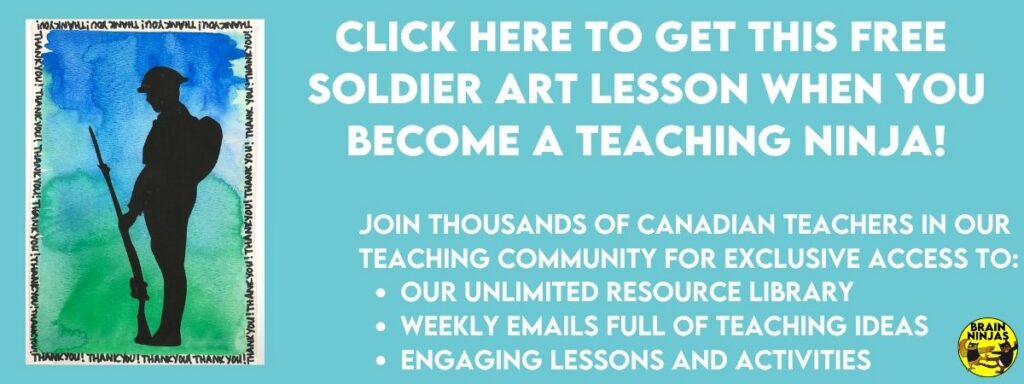
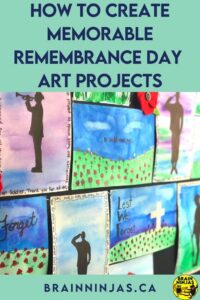
Soldier Silhouettes (Free Lesson)
This complete lesson is available in our Resource Library. We can send it directly to your inbox when you sign up for our email list.
- Wet the paper generously with water. Add the colours, allowing them to blend together. Students can paint right to the edge or leave a rough border around the edge of the paper. Leave this to dry completely.
- Students will add a soldier. They can draw one directly onto their dry artwork. Once the solider is outlined, students fill it in with a black Sharpie or marker. Our lesson includes templates.
- Students will write a brief thank you letter around the edges. One of our students wrote thank you repeatedly, while others wrote a few sentences. It can be tricky to fit all the words in, so we recommend students lightly write with a pencil and then trace over it with a marker.
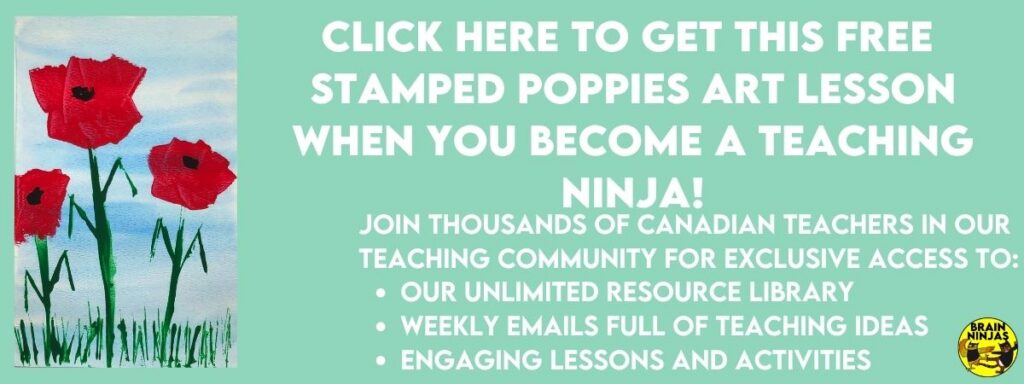
Stamped Poppies (Free Lesson)
This complete lesson is available in our Resource Library. We can send it directly to your inbox when you sign up for our email list.
- Students will create a watercolour wash on their paper. Get the paper liberally wet and then add colour. Let the colours blend together. Generally, the background should be a sky, but greens, blues and purples all look good. In fact, your students can basically use any colour they like except black because it dominates the background too much. Leave these to dry completely.
- Using old plastic gift cards, cut some of the cards lengthwise and some widthwise to make different lengths of cards.
- Dip the long plastic cards in green paint and make stems. Leaves can be made with V shapes. Drag the card along the paper a bit to make it wider. Add a little paint if needed. Grass can be added along the bottom between the stems.
- For the poppies, use the short side of a card. Dig it into the red paint a little and drag it on the paper. The movement is a little like buttering a piece of bread. Most poppies can be made with four strokes. You may have to add more paint between strokes.
- To make the black centre of the poppy, use the shortest part of a card you have and make a little mark in the centre of the petals. You might have better luck if the red paint is dry.
- Students can stamp the poppies onto the watercolour background. We asked our students to stamp an odd number of poppies and to try to have some of the parts go off the page. This adds interest.
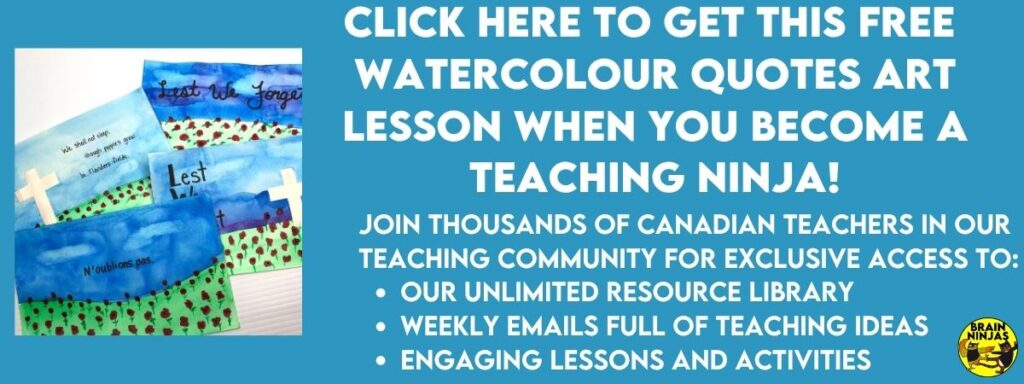
Watercolour Quotes (Free Lesson)
This complete lesson is available in our Resource Library. We can send it directly to your inbox when you sign up for our email list. This Remembrance Day art project includes a little bit of writing.
Day One or Part One
- We break thin masking tape into 10-centimetre strips and tape them to the ledge of our whiteboard. As students gather their supplies, they pick up their pieces of tape. If they get their tape stuck anywhere before it’s time to use it, they have to wait until all the instructions are done to get more.
- The first step is writing names on the back of the watercolour paper with pencil. Pencil is used because it will stay in place even if it gets wet.
- Cut the tape into two pieces. Make one longer than the other. Put the long piece vertical to one side (just not right in the middle) and the short piece horizontal to make it look like a cross or lowercase t. Make sure the edges of the tape are flat on the paper.
- Have students use water on their paper where they will paint the green ground. Add green paint to fill in the space. Students may need to add more water and paint to fill the space completely. They should paint right over the bottom of the vertical pieces of tape.
- Using blue paint and water, paint the sky. Use paper towel to blot away some of the paint to make clouds. Fill in the whole space and let it dry.
Day Two or Part Two
- Remove the tape carefully. If it begins to tear, use scissors to cut away the paper.
- Using red paint, put spots across the ground. They should not be perfect circles or polka dots. These will be the petals of the poppies in the field. Let them dry and then add little bits of green to them. These can be leaves or stems. Let them dry. If your students have learned about perspective, remind them to put the larger poppies closer to the front and the smaller poppies further away.
- Lastly, add a tiny drop of black in the centre of each poppy. We had our students use the tips of their pencils for this step because we didn’t have pointy enough tips on our brushes.
- While the painting is drying, students can think about the quote they want to write in the sky. Using a black Sharpie or a thin-tipped black marker, practice writing the quote a few times on a piece of scrap paper. Once the painting is completely dry, students can write the quote onto their painting.
Watercolour Poppies (Free in our Stores)
This complete lesson to paint poppies is available for free in our TpT Store and BN Shop. It includes step-by-step instructions for every part of the painting, including tips for helping your drawing-challenged students. The version below is a shortened set of steps.
When painting with watercolour, it is important to explain that students should use lots of water to draw the paint across the paper. Rather than dipping the brush in the water and then painting, it should be water, paper, water, then paint, so there is plenty of water on the paper.
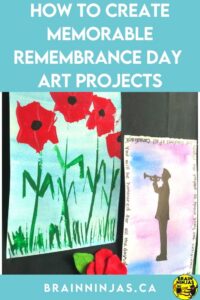
- Show students some photographs of poppies. Using scrap paper, have students whisper draw (light pencil lines) poppies. A simple technique is to draw warped heart shapes with a circle in the centre.
- Teach students some basic watercolour techniques. For this project, the poppy petals will start with a dark shade along the outside edge and then gradually fade toward the centre of the flower. On a piece of scrap paper, have students draw a simple heart shape. If you are using watercolour pencils, shade the pencil firmly along the bumpy part of the heart opposite the point. If you are using watercolour paint, paint a dark line along the bumpy part of the heart opposite the point. Dip the brush in water and then pull the paint across the heart toward the point without adding more colour.
- Practice this technique before using watercolour paper.
- When students are ready, they can sketch out their drawing on watercolour paper and begin their poppy painting. We recommend an odd number of flowers (three or five look great), flowers of different heights and sizes, and at least one that goes off the page. Encourage your students to use the whole piece of paper.
- Paint the background around the flowers.
Felt Poppies
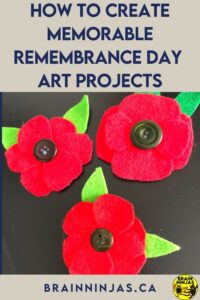
This is a very simple project that one of our students created as a passion project. We added the poppies to our bulletin board in between some of the other paintings.
- Cut out four to eight felt hearts.
- Arrange the hearts like a poppy, with all the pointed parts in the middle.
- Sew the middle of the poppy together. You can also use hot glue to glue the middle of the poppy together.
- Sew or glue a black button on the middle of the poppy.
- Cut out a few green felt leaves. They should be longer than the poppy so they stick out from behind the flower petals.
- Glue the leaves to the back of the poppy.
Mix It Up
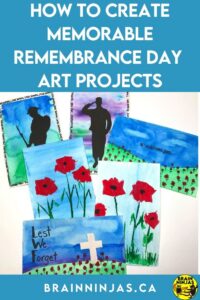
Instead of hanging all of the same projects, consider picking and choosing different works. A bulletin board that has a variety of Remembrance Day art projects like paintings, writings and other crafts is interesting. People will stop in their tracks to take a look.
Have your students write about how the Remembrance Day art projects were made and add them to the bulletin board.
Remembrance Day Art Projects for Upper Elementary: Your Questions Answered
What are some Remembrance Day art projects that are more than just poppies?
We share five Remembrance Day art projects for upper elementary students: Soldier Silhouettes, Stamped Poppies, Watercolour Quotes, Watercolour Poppies and Felt Poppies. Soldier Silhouettes and Watercolour Quotes go beyond poppies, and all five take a little more time and care than a simple poppy craft.
Are there free lessons for these art projects?
Yes. The complete lessons for Soldier Silhouettes, Stamped Poppies and Watercolour Quotes are available in our Resource Library, and we can send them directly to your inbox when you sign up for our email list. The complete Watercolour Poppies lesson is free in our TpT Store ($USD) and BN Shop ($CAD), with step-by-step instructions for every part of the painting and tips for helping drawing-challenged students.
What grade level are these Remembrance Day art projects for?
We created these projects for upper elementary students. They can be done in class with basic art materials found in most schools.
How do we create a Remembrance Day art display for the hallway?
We teach students the basics of all the projects, and they choose two to three to make. We use different sizes of paper so every piece of art becomes a unique part of a collection. Students choose their two best pieces for the hall display, and we keep the rest in our classroom until all the work is sent home. A bulletin board with a variety of paintings, writings and other crafts is interesting, and people will stop in their tracks to take a look.
How do you make stamped poppies with plastic gift cards?
Students start with a watercolour wash background and let it dry completely. Old plastic gift cards are cut in different lengths. A long card dipped in green paint makes stems, leaves and grass. The short side of a card dug into red paint and dragged across the paper makes the petals, and most poppies take about four strokes. The shortest part of a card makes the black centre.
What is the Watercolour Quotes project?
Watercolour Quotes is a two-part painting that includes a little bit of writing. On Day One, students tape a cross or lowercase t shape onto watercolour paper, paint the green ground and the blue sky, and let it dry. On Day Two, they remove the tape, add red poppies to the field, and once the painting is completely dry, write a quote in the sky with a black Sharpie or thin-tipped black marker.
How do students paint watercolour poppies that fade from dark to light?
The petals start with a dark shade along the outside edge and gradually fade toward the centre of the flower. Students practice on a simple heart shape first. They paint a dark line along the bumpy part of the heart opposite the point, then dip the brush in water and pull the paint toward the point without adding more colour. It helps to use lots of water: water, paper, water, then paint.
How many poppies should students paint?
We asked our students to paint an odd number of poppies and to try to have some of the parts go off the page, which adds interest. For watercolour poppies, three or five look great, with flowers of different heights and sizes.
Is there a simple Remembrance Day poppy project that doesn’t use paint?
Yes. Felt Poppies is a very simple project that one of our students created as a passion project. Cut out four to eight felt hearts, arrange them with the pointed parts in the middle, sew or hot glue the middle together, add a black button, and glue green felt leaves to the back.
What if we avoid painting projects because they seem too messy?
If you are avoiding painting projects because you feel they are too messy, read our post Are You Avoiding Teaching Art? Felt Poppies is also a simple option that doesn’t involve painting.
Looking for More Ideas for Remembrance Day?
We have a few other posts with activities for Remembrance Day:
- The Importance of Remembrance Day
- Memorable Books for Remembrance Day in Canada
- Simple and Stunning Remembrance Day Art Projects: These are completely different projects, but they are mostly poppies and they are beautiful. Some of the projects are in the Resource Library.
- Easy to Use Remembrance Day Assembly Ideas
- How to Honour National Indigenous Veterans Day
- Remembrance Day Resources for Canadian Classrooms
Which Remembrance Day art projects have you done with your class? Do you have any favourites? Let us know in the comments below.