
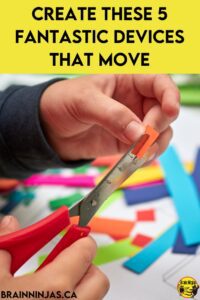
One of the best sciences units includes making devices that move. One of the best things about teaching science is having students create amazing things when they are just left with their knowledge and their creativity. We love to foster this type of learning in our classroom.
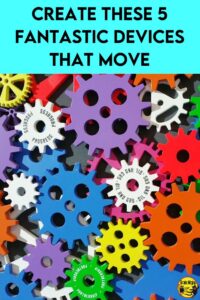
If you teach simple machines, then there are so many different opportunities to have students create and build exciting contraptions. We pulled together a list of ideas and a few of our favourite recipes for devices that move to make your search quick and painless.
We love to do different activities that teach students about the different simple machines but are much shorter to complete. You can read all about those in our post 15 Simple Machines Activities that Will Hook Your Students. We also have a post, How to Leverage Critical Thinking Challenges to Your Advantage, that is full of challenges.
Using the Design Process
One of the best parts about our simple machines unit is that students get to build devices that move. We encourage students to design and build their own devices that move using the design process. This process allows students to explore the materials they have available, design something, create a prototype, and then test and refine their creations. You can learn more about the process in our post, How to Work Through the Design Process.
If you’re interested in our Design Process Bulletin Board Set, find it in our TpT Store ($USD) or our BN Shop ($CAN).
How We Work Through Projects
Projects take a bit of planning before students are unleashed to build devices that move. Before you plan to do any creating, spend some time collecting all the materials you will need. Nothing slows down progress more than running out of materials.
Some students require extra help with time management or planning. Others need help being kept accountable while they work through their projects. If you are new to project-based learning, you might benefit from our post, How to Keep Students Accountable During Project-Based Learning.
You can find a project-based learning checklist in our Resource Library, along with many other general classroom forms to help you organize your classroom. Or we can send a copy directly to your inbox when you sign up for our email list.
Devices That Move
Gravity Powered Car
Making a gravity-powered car involves harnessing the force of gravity to move a vehicle.
Materials needed:
- cardboard box
- scissors or box cutter
- ruler
- marker
- wooden skewers or dowels
- tape or hot glue gun
- small plastic or rubber wheels
Instructions:
- Cut the cardboard box into a rectangular shape, large enough to serve as the body of your car.
- Use a ruler and marker to draw two parallel lines down the centre of the box, about 1/3 of the way from the front. These lines will serve as the guide for the axles.
- Cut two wooden skewers or dowels to the desired length for the axles of your car.
- Tape or hot glue the axles to the cardboard box, ensuring they are centred on the two parallel lines.
- Attach small plastic or rubber wheels to each end of the axles, making sure they are evenly spaced.
- Cut two slots in the back of the cardboard box, one on each side, to allow the car to roll down an incline.
- Place the car on a slope or hill, making sure it is facing downward.
- Release the car and allow it to roll down the incline, powered by the force of gravity.
Ninja Note: Add decorations or change the size and shape of the body. You can also try using different inclines to see how they affect the speed and performance of the car.
Wind-Powered Car
Making a sail-powered car is a unique DIY project that involves harnessing the power of the wind to move a vehicle.
Materials needed:
- large cardboard box
- scissors or box cutter
- ruler
- marker
- wooden skewers or dowels
- tape or hot glue gun
- piece of cloth or plastic sheeting (plastic page protectors work well)
- straws
Instructions:
- Cut the cardboard box into a rectangular shape, large enough to serve as the body of your car.
- Use a ruler and marker to draw two parallel lines down the centre of the box, about 1/3 of the way from the front. These lines will serve as the guide for the axles.
- Cut two wooden skewers or dowels to the desired length for the axles of your car.
- Tape or hot glue the axles to the cardboard box, ensuring they are centred on the two parallel lines.
- Cut four straws to the same length and tape or hot glue them to the cardboard box, one on each side, to serve as the sides of your car.
- Cut a piece of cloth or plastic sheeting to the desired size and shape for the sail.
- Attach the sail to the front of the car, either by taping it to the front of the cardboard box or by hot gluing it to a wooden dowel or skewer.
- Place the car on a flat surface and blow air onto the sail to see if it moves forward. If not, adjust the angle of the sail until the car moves.
Ninja Note: The sail-powered car will only move when there is wind, so it is best to test it outside on a windy day or use a fan.
Balloon Powered Car
Making a balloon-powered car is a fun DIY project that can be done with a few household items.
Materials needed:
- balloon
- straws
- craft sticks or skewers
- binder clips or clothespins
- tape
- scissors
Instructions:
- Cut two straws to the desired length for the axles of your car.
- Cut two craft sticks or skewers to the same length as the straws and use tape to attach one to each end of each straw, forming the wheels.
- Blow up the balloon and tie it off.
- Use binder clips or clothespins to attach the inflated balloon to the bottom of the car, behind the axles.
- Place the car on a flat surface and release the binder clips or clothespins to allow the air from the balloon to escape and push the car forward.
Ninja Note: Customize your car with decorations. You can also try using different materials for the wheels or experimenting with different sizes and shapes of balloons to see how they affect the performance of the car.
Rubber Band-Powered Car
Making a rubber band-powered car is a simple DIY project that can be done with a few household items.
Materials needed:
- wooden skewers
- Styrofoam block
- hot glue gun
- small rubber band
- two bottle caps
- four toothpicks
- scissors
Instructions:
- Cut two wooden skewers to the desired length for the axles of your car.
- Cut a small piece of Styrofoam block to serve as the base of your car.
- Glue the two bottle caps to the Styrofoam block, one at either end, to serve as your car’s wheels.
- Attach the wooden skewers to the Styrofoam block by hot gluing one end of each skewer to a bottle cap and the other end to the Styrofoam block.
- Stretch the rubber band around the two wooden skewers, making sure it’s tight.
- Cut four toothpicks to the same length and hot glue them to the Styrofoam block, one on each side, to serve as the sides of your car.
- Allow the hot glue to dry completely before testing your car.
- To make your car move, simply hold the car by the skewer axles and pull the skewer axles apart. The rubber band will stretch, store energy, and then release that energy, causing the car to move forward.
Ninja Note: Personalize your car by adding decorations or changing the size and shape of the Styrofoam block.
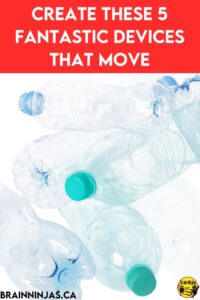
Pop Can Car
This is a variation of a gravity-powered car.
Materials needed:
- An empty aluminum soda can
- Two straight drinking straws
- Four bottle caps (preferably with flat bottoms)
- Duct tape
- Scissors or a craft knife
- Ruler or measuring tape
- Pencil or marker
Instructions:
- Rinse the can thoroughly.
- Mark and cut the can. Measure and mark a line around the can’s circumference, about 1 inch (2.5 cm) above its bottom. Carefully cut along the marked line. The top portion of the can is not needed.
- Create wheels. Take the four bottle caps and ensure they have flat bottoms. Flip the caps upside down so that the flat bottoms are facing up. Tape each bottle cap to the bottom of the can at equal distances from each other. These will serve as the wheels.
- Construct the axle. Cut one straw slightly wider than the width of the can. Attach the straw horizontally to the bottom of the can by taping it securely near the front and back ends of the can. Ensure the straw is parallel to the wheels and positioned in the centre of the can.
- Attach the second straw. Take the second drinking straw and cut it into two equal lengths. Attach each straw vertically to the front and back ends of the horizontal straw using tape, forming a T-shape. Make sure the vertical straws are long enough to extend above the can.
- Cut two small slits on each vertical straw near the top end. Slip the slits over the rim of the can to secure the vertical straws in place.
- Place the car on a smooth surface and gently push it forward. The wheels should roll smoothly.
Ninja Note: Personalize the car and race your friends.
Do You Teach Science in Alberta?
We have written other posts about several different science topics.
- Astronomy Lessons That Are Out of This World
- How to Escalate Your Chemistry Experiments
- How to Learn About Wetlands Without A Pond
- How to Grow a Healthy Classroom with Plants
- 10 Engaging Weather Lessons All in One Place
- How to Shock Your Students With Engaging Electricity Lessons
What are some of your favourite projects for devices that move? We’d love to hear about them in the comments below.