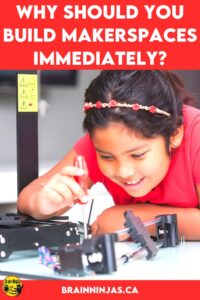
Makerspaces. They seem to be all the buzz, but the concept that drives them isn’t new. For many years, we’ve been focused on directing every moment of our students’ lives. As parents, the lives of children are scheduled to the point they never have a moment to decide for themselves what to do. As teachers, if our students don’t look like they’re working, we worry that someone will think they aren’t learning. So when did we decide as adults that play is a bad thing?
Makerspaces allow for exploration.
Exploration is key to problem-solving, critical thinking, and self-regulation. Children learn by role-playing real-life situations, rearranging toys, touching materials or using items in unconventional ways. So why not include Makerspaces in our school environments?
Here is a classroom example of exploration.
This is an actual situation that happened in our classroom. We gave students a variety of materials, including yarn, tape, spools, buttons and wheels. Students were asked to design a pulley that could pull a water bottle off the ground. No other instructions were given (intentionally) to allow students to explore.
It might have taken 5 minutes if we’d explained or modelled how to do it, but instead, our students struggled to make their pulleys work for about 20 minutes. From the corner of the room, we heard cheering. One group made a pulley by tying the yarn to the doorknob and stringing it through the handle of the water bottle. Another group saw this and decided to improve on the pulley by including one of the spools. Another student asked if the way a pulley is pulled changes its name and then looked it up online. Two students from the first group went to another group that was struggling to help. The resulting pulley was an improvement on the first pulley. At the end of half an hour, every student had made a pulley and could explain how it worked.
Hearing about our success with the pulley lesson, another teacher said she was going to try it. Later in the day, she returned and complained that it was too hard and her students couldn’t follow directions. She was frustrated because they were just playing around.
Wasn’t that the whole point?
She didn’t have time for that. It was a waste of time, in her opinion.
We disagree (and that’s ok because people can disagree and still have valid points). Makerspaces take time, and they can be messy. It’s not for everyone, but if you’re still reading, it’s for you.
Exploration is not exploration if you direct students on how to explore.
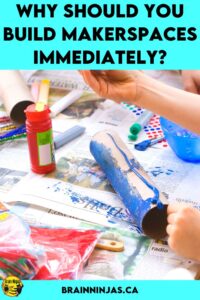
Some days aren’t the right days for play. But that thirty minutes of playtime for our pulley lesson was invaluable and worth every second. Our students understood and could explain pulleys and aced this part of the unit. The students of the teacher that didn’t want to give her students time to explore knew the basics, but they lacked any desire to investigate further, learn more or try to deepen their grasp of the concept. It was just basic rote knowledge.
Thirty minutes of play is a pretty small price to pay, but it doesn’t happen in a vacuum. The environment you, as the teacher, creates is the way your students will respond and learn. Students need to feel it is safe to play. It is safe to explore. It is safe to take risks and try things out. They need to know it is safe to share their learning. It is safe to make lots of mistakes. It is safe to ask for help.
That takes time.
The next day three students in our class showed up with pulleys they built at home. We had all kinds of contraptions by the end of the month. We are probably the only classroom that has a welcome rise up each time the classroom door opens (because of pulleys).
Don’t make planning an assignment.
Students need to think about what they are going to create, but if you turn this into a long, drawn-out process, you will kill their creativity. Allow students to explain what they are going to make quickly and simply and then send them straight to work creating. They might make a sketch, draw something or write down a few ideas, but plans are just meant to get students started. Makers make. Planners just plan but rarely get their making done.
One way we encourage exploration is through this set of Makerspace Exploration Task Cards. Each card features a simple task that can use any materials you have on hand. Find them in our TpT Store ($USD) or BN Shop ($CAN).
Creativity takes time.
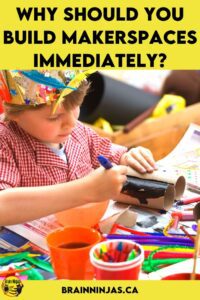
Your students will amaze you with their creations, but you need to give them adequate time to work. In our classroom, there are two types of creations: Make & Break or Make & Take.
Depending on the types of materials you have available for your makerspace, you might have to make some choices about how materials are used. Not sure what to put in your makerspace? Check out this post: What Goes in a Makerspace?
Make & Break: This means students can create something with materials but will be expected to return all the pieces. This is most common with Lego and wooden blocks. Students are always allowed to take photos of their creations as a way to “keep” them. All the pieces are taken apart and returned to the makerspace.
Make & Take: This means students can keep the project when they finish. These types of materials are more consumable, like knitting, cardboard creations and craft-type activities. Most of these materials are donated to our makerspace by members of our school community.
As a teacher, it’s easy to want to help students in the makerspace, but it is part of the process for students to go through the creation process on their own. It’s how they will learn best. If we always fix things for them, they will not learn to fix things on their own.
We also have two types of projects: independent or learning goals.
Independent: Students decide how they will use the makerspace and choose the project on their own.
Learning Goals: We have students use the makerspace to create something in particular (usually related to a learning goal).
Check out this blog post that talks about some of the different types of learning goal challenges we do in our makerspace: How to Leverage Critical Thinking Challenges to Your Advantage.
Students need to test their creations when solving a problem.
If students are making something that has a purpose, they need to have time to run a test and make adjustments. They will need something specific to test for. The easiest thing to check for durability (will this make it home without falling apart?). If you are making something that has a specific goal, be sure to give students a chance to check that it works the way they intend.
Basic things students can test for:
- weight
- height
- balance
- strength
- durability
- speed
- that it works the way it’s intended
- that the experiment can be replicated
Don’t forget to refine it.
Students need to take what they learned from their testing to refine their creations. They can use what they learned to make their project better. The ability to refine is based on quality feedback from peers and teachers. You can read more about how to give great feedback in our post: How to Give Amazing Student Feedback.
Refining is a skill that students don’t often get a chance to develop, often because once something is built we tend to feel that it’s done. There is always room for improvement and then the entire design process can start again.
We teach refining as one of the design process steps. This process is included in our Design Process Poster Set. You can get more information about this process in our blog post How to Work Through the Design Process. Find the poster set in our TpT Store ($USD) or BN Shop ($CAN).
Basically, the design process follows these basic steps:
- What is the problem? What are students trying to solve or create? This can be given to them by the teacher or they can come up with the problem themselves.
- Explore: Students have a chance to look at the different materials that are available and play with them a bit before committing to a creation.
- Design: This is the planning stage, but it doesn’t have to be a formal plan. It can be a drawing, sketch, list of steps or even just a basic explanation about what the student plans to try.
- Create: Students make the thing they wanted to make. This is the most fun part for most students, so be sure to give them lots of time.
- Test: Students check that their creation works the way they want.
- Refine: Students take what they learned from their tests and improve their creations. They might even choose to start again, modify or just tweak a few things.
The cycle continues until the student is satisfied with their creation.
Reinforce the Design Process
We have a set of posters that you can use in your makerspace or classroom. One tip: print two per page so they are half the size of a piece of paper. This way, you can place them across the top of a bulletin board dedicated to your makerspace so it looks like a border. They come in colour and black and white (so you can print them on coloured paper and save some printing costs). Find them in our Resource Library if you are already a member of our email list. If you’re not on the list, we can send them directly to your inbox.
Makerspaces create problem solvers.
The biggest thing we noticed in our students was their ability to persevere and overcome challenges. Students were proud when they solved problems-especially when they were able to figure things out all on their own.
This is especially true when the problems they are solving are authentic, real-world problems. Your students might be the ones who cure cancer or find a way to solve the plastic overuse problem. All you have to do is allow your students to create and learn.
So, are you convinced? Do you want to create a makerspace in your classroom? Not sure where to start? Check out this blog post How to Create an Inviting Makerspace.
Do you already have a makerspace? What have you found to be the biggest benefit? Let us know in the comments below.

