Do you want to create a makerspace for your students but you aren’t quite sure where to start? Do you need makerspace ideas? Are you worried about the mess or where to get the supplies? Do you have zero dollars in your budget?
Those are the questions we asked ourselves before creating a makerspace in our classroom, but it truly was a transformation that we love. Here’s a quick quiz for you to decide if you can and should have a makerspace in your classroom. Hint: it’s not for everyone, but it might be right for you. Come read our makerspace ideas.
Can you handle the mess of a makerspace?
If the answer is no, you shouldn’t have a makerspace.
They’re messy, but that’s part of the fun. That’s how learning happens.
Keep your makerspace organized by having labels and containers for the materials. Teach your students to respect the makerspace by cleaning up after themselves, but accept the fact it will be messy while students are working.
If you are looking for some labels for your makerspace containers, you can find them in our store. We label all the things not just because we like them to look organized, but because we want to help our students find what they need and put it away when they don’t need it. Find the Makerspace Labels in our TpT Store ($USD) or BN Shop ($CAN).
We also purchased little brooms and washcloths so students could clean up the space when they were finished. It helped keep the area tidy which kept us calm.
Can you let go of the control?
If the answer is no, don’t have a makerspace.
Students need to feel free to make what they want to make without your controlling input. Besides, you never know when you might need something you didn’t even know you needed but your students create.
Like a pencil case that lights up. Yes, that happened. In case we are ever in the dark and need a pencil, we’ll be able to find one.
Students need to experiment without worrying about doing it wrong. There is no “wrong” in a makerspace. If you always jump in to fix things or help, students will either stop trying to solve problems on their own or won’t even bother exploring anymore.
Don’t teach your students to become helpless. We wrote an entire post about this called Are you accidentally teaching helplessness? Don’t kill that creativity by making students do things your way (other than basic rules and such).
Moral of the story: if your student wants to create the world’s ugliest piece of garbage-let them. And then ask them lots of questions and get excited about it. This might be the kid that cures cancer one day. Let your students explore by completing little exploratory tasks. You can find this set of Makerspace Exploration Task Cards in our TpT Store ($USD) or our BN Shop ($CAN).
Can you accept that kid work may not be as cosmetically appealing as you’d like?
If the answer is no, then don’t have a makerspace.
Kids are going to cover their ideas in tape and glue and that’s ok. Just because it doesn’t look as nice as you’d like, doesn’t mean the learning isn’t valuable.
It’s a little like the adult version of teaching where you can have the cutest Pinterest-worthy classroom, but it doesn’t mean the students are learning. Pretty does not equal value.
Your students will learn to make things that work better, last longer and look prettier when they’ve mastered skills like figuring things out, watching how things work, testing materials and refining their inventions.
Do you have a table?
It doesn’t matter. Just designate any space as your makerspace. This is where your materials are stored. If it’s a small space, accept the fact that students are going to make things all over the classroom or the floor. The makerspace is not defined simply by its location.
Having some tables or flat surfaces of any kind makes some of the work easier, but before we had a table in our makerspace, we just worked on the floor.
Having a place to store all the materials is important. If the materials are all over the place they’ll get wasted, ruined or thrown away.
Do you want to learn new things about your students?
Of course, you do! A makerspace is a great way to learn what your students can do when they are left to their own imaginations. They will amaze you.
If you are convinced that you want a makerspace, it’s time for you to do a little light reading so you’ll be prepared. We have a few other posts about makerspaces. What Goes in a Makerspace? covers the different materials that will make your life so much easier (because it’s hard to create when you have nothing to create with).
There are no rules for makerspaces. You get to decide. Your makerspace ideas are correct! Our very first makerspace was created by accident when we left a set of linking blocks on a table. Students started playing with them in between subjects or when their work was finished. Soon the table was covered in creations. We started adding other materials to the table over time and BOOM! Makerspace!
Do you have to convince your administration that a makerspace would be a valuable asset to your school or classroom? You should read our post Why Should You Build Makerspaces Immediately?
If you want to try making without the full commitment of a makerspace, try hosting a maker walk instead. This will generate interest and give you a good idea of how many students might be willing to help get a makerspace going in your school or classroom. We’ve already done the planning for you in our Host a Maker Walk planning guide. Find it in our TpT Store ($USD) or BN Shop ($CAN).
Makerspace Ideas to Create the Space You Want
There is no one way to do a makerspace. You can create the space you want. You can be a makerspace maker! Sometimes you just need a few makerspace ideas.
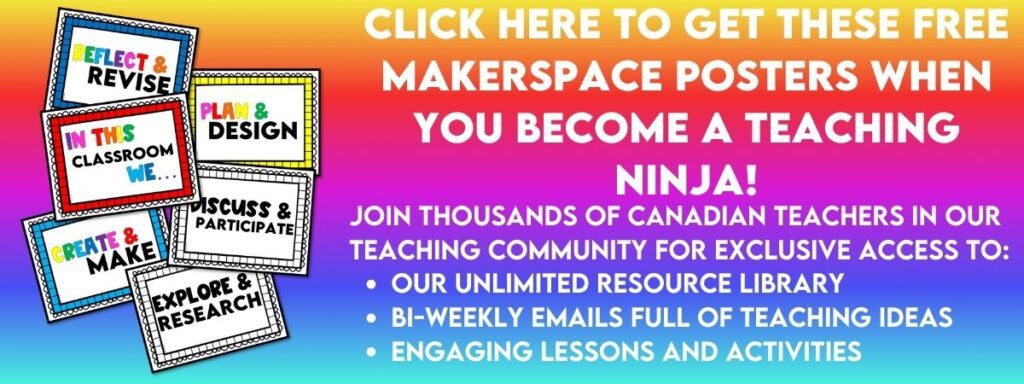
We made a simple set of posters to decorate our makerspace, and we want to share them with you. The posters come in colour and ink-saving versions. If you are already on our email list, you can find the posters in the Resource Library. If you’re not a ninja yet, we can send it directly to your inbox when you sign up for our email list.
We also have a poster set that features the Design Process. You can learn more about it in our post How to Work Through the Design Process. Find the Design Process Posters in our TpT Store ($USD) or BN Shop ($CAN).
What is your greatest fear about having a makerspace? Are you looking for more makerspace ideas? Leave us a comment below. We’ll see if we can solve your problem!