If you are an elementary generalist in Canada, chances are, you are teaching art. That can be challenging if you don’t consider yourself an artist. Here are some tried and true routines we’ve put in place with our classes over the years that have saved our sanity.
Maybe you’ll start enjoying teaching art again!
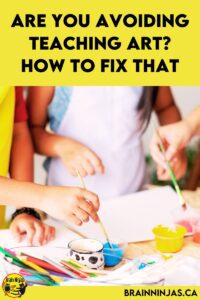
Regular Classrooms Are Not Designed for Teaching Art
Whoever designed classrooms and didn’t think sinks would ever be needed has clearly never been around children. If you are blessed enough to have a sink in your classroom you are SO lucky. It is not always the case. Even more, we have CARPET! Yes, it dulls the sound, but let’s be honest, I don’t even want to think about what might be growing in it.
Do you avoid teaching art because you don’t like the mess? Yes, it can be messy, but we believe firmly that students should be responsible for our classroom. They learn very quickly if they make a mess, they will have to clean it up.
Our students are in grades four and five, but we have also taught grades two and grade three and use the same routines. There is no such thing as students being too young to clean up after themselves. You just have to teach them, reteach them and then help them learn.
Set Up is a Breeze (Now)
Our students have learned that for every single art lesson, we will be making a list of items that are needed for the project(s) and they will be posted on the whiteboard. Here are some of the common instructions:
Pods
This means putting your desks in pods sitting together. It will be followed by a number that tells students how many people should be in the pod. For example, Pods (4) means we want four students sitting together in a pod. For the most part, our students already sit in these formations, but we don’t make students sit in a seating plan, so they choose where they think they can sit and still get their work done. We always reserve the right to assist them in their decision.
Cover
This means someone from the pod needs to get a tablecloth and cover the desktops.
Supplies
We list the items and it is assumed that students will pick up one for each group member. So if it says brushes, then they will pick up a brush for each group member. If the whole group only needs one item (like one bowl) then we put the number behind that item on the list. For example, bowl (1).
Water
Our students are trained to take a bin to the hallway fountain (yup, it’s a fountain). They fill this half full and bring it into the room. It gets put on the table. Students then fill their water cups for painting half full by getting water from a bin. (They dump out their dirty water in the drain next to our hall fountain.)
Time
We put a time limit on how long students have to collect these items. Anything that is not ready before the time runs out will be picked up AFTER the lesson. Our students have learned that even when they have the supplies they aren’t allowed to touch them.
Now, we didn’t start here. This took a whole six weeks to learn to do, but once our students learned it, we never had to spend any time teaching it again and art lessons became a breeze. We occasionally review the expectations with students, but otherwise, it runs pretty smoothly.
And, in the beginning, we didn’t hand out the supplies until AFTER we taught the art skill or lesson we were teaching. Then we handed out some of the supplies (but not the important ones) once we got good at not playing with them. Eventually, we got to all the supplies being set up before starting.
Clean Up is a Breeze, Too
Basically, we do the clean-up in reverse. We write a few things on the board for all students to view.
Where to Place Finished Art
Be clear about where you want students to place art that is finished. Have a place ready for them.
Where to Place Incomplete Art
Be clear about where you want students to place art that still needs work. Have a location set aside and use it consistently.
Assign a Leader and Other Cleaning Roles
Each pod selects a leader. That person’s job is to make sure all the clean-up steps are taken, in the right order. There are several possible jobs that need to be done:
paint brush cleaner
One person takes all the brushes from the group and washes them. We train our whole class on how to wash the paintbrushes without ruining them and then we slowly have students take over this role. In the beginning, we spend time rewashing brushes, but eventually, we allow a student to take over this role. We also teach students how to wipe up the sink area (ours is a fountain) so no paint is left anywhere.
paint palette cleaner
We have a great tip for this. Place plastic wrap on your palettes. Throw out the plastic to avoid washing. We use hard plastic plates. Occasionally we throw them into the dishwasher. Teach students not to stack the plates. It prevents needing to wash both sides of the plates.
project manager
This student puts the projects where they need to go (finished or unfinished). They also ensure names are on each of the projects.
miscellaneous supplies
A person cleans up any other supplies not mentioned.
cleaner
This person washes the tablecloth. We have a bucket of warm water with washcloths prepared right before clean up. Each group gets one cloth. We take these home and throw them in the wash after big projects or once a week because we wash everything with them.
folders
Two members fold the cleaned tablecloth and put it away.
Then when it is finished, students return the room to normal. They put all the desks and chairs back where they belong.
Believe it or not, that whole process only takes between five and ten minutes now. It took much longer in the beginning. We taught it bit by bit over about six weeks. It’s even faster if the clean-up is up against recess because we have an agreement that we all go together, meaning if the room isn’t clean, we help out whoever needs it to get it all done. Nobody wants to miss any of their recess.
Some of our BEST mess savers
Covering paint palettes
Putting plastic, wax paper or parchment paper over each palette makes clean-up quick. Recover them each time you use them so you don’t have to spend time before lessons. This is a great task for student volunteers.
Teach, practice, repeat
Teaching your students to properly clean materials will save you time. You don’t have time to wash things every time you teach art. If you can’t teach everyone, teach a crew that will take on the responsibility.
Invest in tablecloths
Plastic tablecloths with flannel backs will last longer than the party-style ones from the dollar store that tear easily. Duct tape holds rips closed. It’s easy to wipe, too. They are inexpensive enough that you can cut them to size. We wipe them down each time we use them, but I take them home once a year to give them a good wash with a soapy cloth. I hang them to dry as they won’t last in the dryer.
Invest in a sturdy bucket and washcloths
We use these to clean up after art and they are a big saver. Plus! They are better for the environment than paper towels or wipes.
Invest in a few little brooms and dustpans
We picked up six of these. Even though we have carpets, they come in handy sweeping up all kinds of little messes like pencil shavings.
Collect paint shirts
Ask parents to donate old T-shirts to use as paint shirts. Even big kids sometimes need a shirt to protect their clothing. I take these home a few times a year to wash them. We’ve used the same shirts for YEARS.
Help! I Can’t Draw!
Preaching to the choir! We would never classify ourselves as artists, in fact, some years our students have playfully joked about our “drawing.” That’s not really what art is about. Art is about conveying emotions visually.
You can do that.
If you’re still thinking, nope, well, we have some lessons that might work for you. We designed lessons for teachers who are generalists with supplies commonly found in most classrooms. You don’t have to run all over the countryside looking for art supplies.
Generally, we like to work on painting with Tempera and watercolour early in the year so students can use those skills over and over again. We don’t tend to follow a specific pattern for art lessons and like to mix seasonal pieces with skills throughout the year.
We have been creating and writing lessons for years now and have put them into a few different sets. Sometimes we integrate art with other subject areas in an attempt to meet outcomes from both subject areas, but also to create deeper connections between content areas. If you’re looking for some more information about how we connect art and social studies, you should read our blog post: Connecting Social Studies and Art.
Art Lessons for the Classroom
Best of all, we have a simple, free lesson you can use. This project is included in our Winter Art Inspired Lessons, which can be found in our TpT Store ($USD) or our BN Shop ($CAN).
Art Lesson Sets
Here are some of our other best-selling art lesson sets. You can pick and choose through the lessons and they work year after year.
Artists of Canada: These projects are inspired by artists who call Canada home. Find it in our TpT Store ($USD) or our BN Shop ($CAN).
Indigenous Artists in Canada: Some of our favourite Indigenous artists inspired these lessons. You can see one of the projects in this post. Find it in our TpT Store ($USD) or our BN Shop ($CAN).
Plants Inspired Art Projects: These art lessons connect learning from the Plant Growth and Changes unit. Find it in our TpT Store ($USD) or our BN Shop ($CAN).
Light and Shadow Art Projects: These art lessons connect learning from the Light and Shadow unit. Find it in our TpT Store ($USD) or our BN Shop ($CAN).
Winter Art Lessons: Snow, snowmen, and the Northern Lights inspired these works. Find it in our TpT Store ($USD) or our BN Shop ($CAN).
Geography and Landscapes Art Lessons: This is a series of lessons that connect art and geography. We use it as part of our social studies unit. Find it in our TpT Store ($USD) or our BN Shop ($CAN).
Upcycled Art Lessons: This collection of art pieces is perfect for Earth Day and repurposes recyclable materials into great keepsakes. Grab this free lesson in this post about Earth Day. Find it in our TpT Store ($USD) or our BN Shop ($CAN).
Halloween Art Projects: Adapt these projects with monsters or aliens instead of Halloween items for students who don’t celebrate. Find it in our TpT Store ($USD) or our BN Shop ($CAN).
Christmas Art Projects: These projects make great gifts and decorations for the Christmas season. Find it in our TpT Store ($USD) or our BN Shop ($CAN).
And if you just need art lessons all year, try out our Art Lessons Bundle. All the sets listed above include teacher lesson plans, photos of student examples, suggestions for modifications and reflection pages for students and teachers in English and French. Find it in our TpT Store ($USD) or our BN Shop ($CAN).
Now, it’s easy to accidentally allow your fears about art to creep into the minds of your students, but the truth is that art has no rules. Feel free to be free and just have fun with it.
Are you Looking for Seasonal Art?
We have several craft and art projects found in posts on our site or in our store:
- Remembrance Day Art Projects
- Halloween Art Projects
- Recycled Materials: Christmas Wreaths
- How to Create Wooden Ornaments for Christmas
- Recycled Paper Ornaments
- How to Make Recycled Can Characters
- Simple Christmas Tree Projects We Love
- How to Make Recycled Cork Ornaments
- Fingerprint Art
- Even More Remembrance Day Art Projects
- Back to School Art Projects
- Heart Art Projects You’ll Love
If you teach art in your classroom but don’t think of yourself as an art teacher, what are some of the challenges you face? You don’t have to be afraid of art! We’d love to help you out. Leave us a comment or a question below.


