Does your school ask you to create Christmas art to decorate the halls or gymnasium during the concert season? Over the years we’ve taught at schools with all-out Christmas concerts and others that were more secular in nature. However, the artwork requests have typically been the same. Some years we create Christmas art while others are just winter. Come learn a few of the fastest projects you can get knocked out in just a few hours from start to finish.

This post is a round-up of our Christmas blog posts and resources containing Christmas art projects. If you are looking for winter-themed projects, check out Winter Art Projects That Will Warm Your Heart instead.
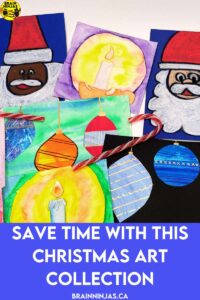
We have several Christmas art projects in our resource Christmas Art. Many of these can be turned into student gifts for their families and you can use them to spruce up the halls. This resource has more than ten projects that use general supplies in most classrooms. Each project includes step-by-step instructions, photos of the steps when it helps and photos of the finished projects. The resource includes reflection pages in English and French and suggestions to modify the lessons depending on the skill of your students or the supplies available.
Find Christmas Art in our TpT Store ($USD) or our BN Shop ($CAN).
Don’t Stick to One Christmas Art Project

As a parent, there’s no worse feeling than seeing a collection of art projects that are the same except for that one child who didn’t follow the instructions. It stands out. Projects that require students to follow the exact same drawing or proportions can teach students techniques, but they shouldn’t be used on display. Display works should allow students to be creative and show off what they’ve learned.
In one of our most successful years, we tried something different. We haven’t created a traditional bulletin board since. We shared the instructions and samples of three different Christmas art projects. Students completed two of them. Then students choose their best work for the display. When we made the bulletin board, there was a variety of artwork. It was less possible for people to compare one work to another. Some students even created all three projects, so there were a few extra to view.
To do this, we first taught each project. This included making a step by step anchor chart so students would be able to refer to it to follow the project (if there were steps) Sometimes we just tell students which media they can use and give them a theme. It always results in the best art because students can create from their own inspiration.
Christmas Trees
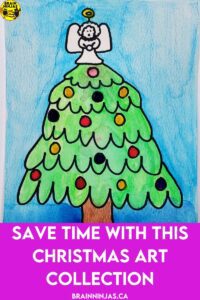
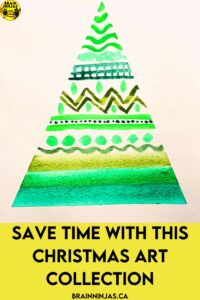
You can’t go wrong with a Christmas tree, but if you need to go less Christmas-y, it’s easy to switch to a winter tree. Christmas trees are an easy shape that most students can easily master. They can also be less detailed and more abstract with a simple triangle. We have a few Christmas tree projects in our post 12 Simple Christmas Tree Projects We Love.
We also have a few different Christmas tree projects in our Christmas Art resource. Find Christmas Art in our TpT Store ($USD) or our BN Shop ($CAN).
Santas and Reindeers
Well, this kind of speaks for itself. We have a simple Santa drawing that can be done with pastels in our Christmas Art resource. As for reindeer, we tend to leave those for the younger grades. If you’re looking for a three-dimensional option, we have a project that turns a can into a character. These can be placed on the stage or around the doorways instead of being attached to the wall like two-dimensional works. Learn more in our post How to Make Recycled Can Characters.
Find Christmas Art in our TpT Store ($USD) or our BN Shop ($CAN).
Create Ornaments

Ornaments are another way to decorate your school for the concert season. These are a smaller version of Christmas art that can be made in a short amount of time. Create a large paper tree for the wall or a bulletin board. Attach it to the wall. Hang ornaments made by your class.
We have made a few different posts about ornaments over the years. Check out How to Create Recycled Paper Ornaments, How to Make Recycled Cork Ornaments, or How to Make Wooden Christmas Ornaments.
We have a project in our Christmas Art resource where students create a picture of hanging ornaments. Find Christmas Art in our TpT Store ($USD) or our BN Shop ($CAN).
Create Christmas Art Cards
If you don’t need to decorate your school for a concert, another popular way to share the art is by turning it into cards. One year we had a group of students that loved watercolour painting. We already had a handful of watercolour paper scraps. Students painted small winter and Christmas scenes. We attached the pictures to make cards.
Some students created cards with fingerprint art. Learn more in our post How to Create Fingerprint Art Projects.
You can hang the cards as a decoration until after your school concert. Then you can gift them to families or hand them out in your community. Check out How to Spread Joy With Handmade Community Christmas Cards.
Find different watercolour art lessons in our Christmas Art resource. Find Christmas Art in our TpT Store ($USD) or our BN Shop ($CAN).
Turn Decorations into Gifts

If you have access to old picture frames, fill them with the Christmas art of your students. Give them to families as gifts. If you don’t have frames, have students mount their work on cardstock or matting to make it stand out.
We found old frames at the Reuse It Store in our community, but you can also ask families to donate old frames to the school. They don’t need to have glass, but we asked that they be 11×17 or smaller (just because we didn’t have any projects that would fit in larger frames.
Your students can also make their own wrapping paper with butcher block paper and some tempera paint. They can make simple prints or just draw on the paper. Make sure it’s dry before wrapping any gifts.
Read more in our post How to Make Christmas Art Projects to Give.
Create a Mural
If you need a simple, but pretty quick project, a mural works so well. Get a large piece of butcher block paper. Draw a horizon line along it. Choose a scale that students will work to. For example, choose the height of the people or the buildings that students need to draw (this just helps the mural look like it is one scene. Assign a section to each student. Have them draw or paint a house or outdoor Christmas scene.
We laid the paper out in the hallway. Ten or so students worked at the same time with the other half of the class inside working on some busy work. We had a parent volunteer help with supervision, but students worked on the section for about thirty to sixty minutes.
Once all the students were finished, we assigned a few students to do a quick overview adding snowflakes or painting the ground with snow so that the whole mural felt like one scene. One of the students painted the sky blue while others made sure the whole paper was painted.
Even though the logistics take a bit of work, this is a project that can be completed the day the artwork is due to be hung up.
Make sure you attach the mural to the wall securely. Our school walls are cinderblock, so we rolled masking tape under the mural and then plenty more around the edges.
When the mural comes down, it can be rolled up and quietly recycled. Or, you can do a drawing in your class and send it home with a student. Don’t forget to photograph it while it’s up on the wall in case students want a copy of their own.
Create a Collaborative Poster
If you don’t have time to make something original, use a collaborative poster. Our posters are usually standard poster size, but you could print the pages on 11×17 paper. We haven’t tried this, but you may need to adjust your printer settings to “fit to page” or print a copy them run it through the copier again on the larger paper.
Our posters come with 18, 24 or 36 pieces so they work with any size class. You can have your students use markers, pencil crayons or paint to complete their pieces. The pieces are assembled into the poster, which you can then hang on the wall for the concert. We have a few different posters that may work for Christmas-related events.
The poster resources also include a follow-up activity to keep your early finishers busy while the other pieces are being finished. You may choose to have students cut out their pieces or ask a volunteer to cut them out and assemble the poster.
The Jingle All the Way Collaborative Poster can be found in our TpT Store ($USD) or our BN Shop ($CAN).
May Your Days Be Merry and Bright Collaborative Poster can be found in our TpT Store ($USD) or our BN Shop ($CAN).
The Joyeuses Fêtes Collaborative Poster is in French, but the instructions are in English. Find the poster in our TpT Store ($USD) or our BN Shop ($CAN).
Think Outside Christmas Art

While it’s easy to get caught up in Santa and his reindeer, there are lots of other images that can be created as decorations for Christmas concerts.
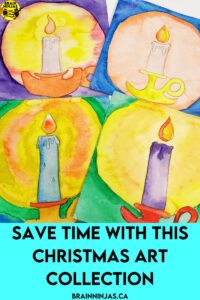
Don’t forget about candles. Drawings and paintings of candles are quite easy for students. We have a watercolour painting included in our Christmas Art resource. Find Christmas Art in our TpT Store ($USD) or our BN Shop ($CAN).
Wreaths are another symbol that students can create. If you’re looking for a hands-on project, students can create wreaths from recycled materials. Learn more in our post How to Make Christmas Wreaths With Recycled Materials.
Have students create a Christmas scene using a technique students already know. We created this art project to examine city landmarks and buildings, but students can draw a Christmas tree or winter scene instead. They can use the technique included in this lesson. We’ll send the lesson to you for free when you sign up for our email list. If you’re already on the list, find it in our Resource Library.
Looking for Other Art Lessons?
We have posts for other seasons.
- Heart Art Projects You’ll Love
- How to Create Memorable Remembrance Day Art Projects
- Simple Art Projects for Back to School
- Simple and Stunning Remembrance Day Art Projects
- Art Projects That Will Last All Year
What projects have you tried? What projects are missing? Let us know in the comments below.


