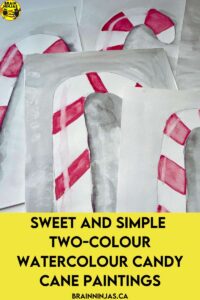
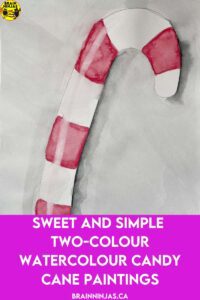
We love to teach students new simple techniques for painting with watercolour. We created this Christmas art project that only uses two colours as a way to practice a technique where students remove paint from their page. This watercolour candy cane painting teaches students techniques like adding light and shadows.
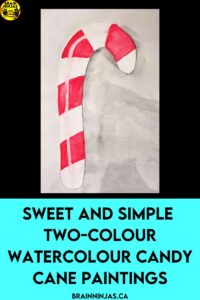
We created a painting of a candy cane because it was an image that most students could easily draw and paint. All of our students recognized the candy cane as a shape and the colours of red and white stripes. Yes, you might be able to add green into the mix, but we’ll leave that to your own discretion. Our instructions don’t include green, but you would need to add in a green strip between the red or white stripes.
Prepping for the Lesson
We started by cutting watercolour paper into smaller pieces. The pieces we used ended up being approximately 20 cm by 10 cm. When we are learning new techniques, we often use smaller pieces of paper. It makes it less wasteful, but also allows students to practice on good paper without it costing a fortune. If you already have scraps of heavier paper, these also work well.
We use old bowls for our water dishes because they are a little wider and don’t tip as easily. If you’re looking for other ways to keep the mess at bay, read our post Are You Avoiding Teaching Art? How to Fix That.
Give each student a watercolour paint brush, watercolour paints (you’ll only need red and black), a pencil, a paper towel, a piece of scrap paper, a piece of watercolour paper, and a cup of clean water. If students are making a good copy, we also use a bit of masking tape to tape the paper down onto the desk or a hard surface. This keeps the page from curling or bubbling a little less.
Start With a Simple Drawing
Start by teaching students to draw a simple candy cane. Practice this on a piece of scrap paper. Draw a J, then draw a second J a little further away. Some of the canes will be fat and others will be skinny. It doesn’t matter, but this activity is a little easier if the candy cane is fatter. Encourage students to draw very lightly and erase fully when changing lines. We call these whisper lines. Connect the Js at the top and bottom of the cane, making a candy cane shape.
Once students feel confident, have them draw a candy cane on their watercolour paper. The direction of the cane doesn’t matter.
Start Painting Your Watercolour Candy Cane
Before we try something on our watercolour paper, we always attempt the step on a scrap piece of paper. This helps us learn how to use the brush with the paint and water in a lower-risk way. Students can redo the step as many times as they need to without fear of ruining their painting. Even so, this whole painting is just an exercise, so perfection is definitely not the goal.
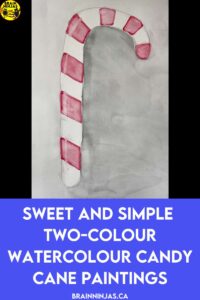
Explain that painting with watercolour means painting with water and then adding colour. It’s easy to remember because of the word “watercolour”, where “water” comes before “colour.” Add water to the paper in the spaces where students plan to add red paint. This should alternate to every other white space, making red and white stripes from the top to the bottom of the cane.
After painting with water, dip the brush in water and wipe off the excess on the side of the bowl. Lightly brush the paintbrush across the red paint. Teach students to keep the bristles in one direction and not to grind their brush into the paint. That destroys both the brush and the paint. Also, avoid adding water to the paint palette. This just makes a mess and doesn’t get a better paint result on the paper.
Paint red along the inside of the candy cane and then use water to pull the paint throughout the space that will be red. If students want the area redder, repeat the process, adding a little more paint each time.
If students are finished painting with the red, have them clean their brushes, tapping the extra water out of the bristles while they wait for the next part of the lesson.
Ways to Dry Your Painting Between Steps
Let the red paint dry before moving on to the next step. Students can lightly blow on the page, or you can leave the page to dry while you model the next steps. When you are modelling, ask students to put their paintbrushes down so they don’t start before it’s time.
If the page is very wet, be careful blowing on the paint because it might cause the paint to move outside the lines. If there are areas where the water has pooled on the paper, touch a piece of paper towel to the edge of the water and let it soak up.
Choose the Light and Shadow
Have students look at their painting. One side will be the light, which will cause the shadow on the other side. We asked students to place an object on their desk to represent the light. For each step, we reminded students to put the shadow on the side opposite the light.
Add a Shadow
Many students mess up this step by adding way too much black. Practice on the scrap piece of paper.
Get the brush wet and run it along the outside line along the inside of the candy cane where a shadow would be found. Without dipping the brush in water a second time, add a bit of black. You need only a tiny amount.
Create a shadow by adding more water and black until the candy cane appears to have a small shadow. If there is too much black, add water to the brush. Run it along the black on the page to pull the paint off. Dab the brush on the paper towel after each pass. If there is not enough black, add small amounts at a time until you are happy with the look of the shadow.
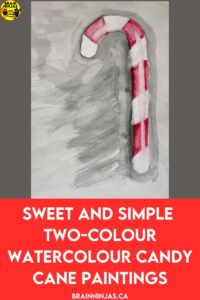
Add the Light
Clean the brush. Leave the brush wet, but get rid of any excess water by lightly touching the paper towel.
Run the wet brush along the candy cane to create a bit of shine. The shine line should be a little off-centred opposite the shadow. Students may need to repeat this step a few times to remove enough red paint that makes the shine. They should clean their brush in between each pass.
Try Again
Our first paintings were not amazing works of art, but many of our students used the techniques to make a second painting where the results were much better. We recognize that this is a very simplified version of helping students understand light and shadow in a painting, but since we work with younger students, it is a good way to get them to start learning about how to make their paintings appear more three-dimensional.
One of the biggest mistakes students make is that they keep painting long after they should have stopped. If your students obsess over perfection and their paper becomes a wet, soggy mess, encourage them to use their scrap paper.
Some students did not wait long enough for their paintings to dry before starting the next step. If possible, build in breaks around the steps. For example, paint the red before recess and then come back to paint the shadow after recess.
If you’re looking for another watercolour technique, try masking. We created this lesson for Remembrance Day, but you can use the technique any time of year. We’ll send the lesson to you for free when you sign up for our email list. If you’re already on the list, you can find it in the Resource Library.

Keep Painting
We have lots of other painting and art lessons available. Our lesson plans always include step-by-step instructions. Sometimes these even include diagrams, photographs of examples, and modifications for materials for your students. Our lesson sets also include student and teacher reflection pages in English and French.
- Artists of Canada can be found in our TpT Store ($USD) or our BN Shop ($CAN).
- Geography and Landscape Art Projects can be found in our TpT Store ($USD) or our BN Shop ($CAN).
- Find Halloween Art Lessons in our TpT Store ($USD) or our BN Shop ($CAN).
- Indigenous Artists in Canada Inspired Art Lessons can be found in our TpT Store ($USD) or our BN Shop ($CAN).
- Upcycled and Recycled Materials Art Lessons can be found in our TpT Store ($USD) or our BN Shop ($CAN).
- Find Winter Art Lessons in our TpT Store ($USD) or our BN Shop ($CAN).
- Christmas Art Lessons can be found in our TpT Store ($USD) or our BN Shop ($CAN).
Find More Art Lessons
We have more posts full of art lessons on our site.
- How to Explore Métis Storytelling Through Indigenous Art Lessons
- 12 Simple Christmas Tree Projects We Love
- How to Make Valentine’s Day Love Trees
How do you teach watercolour techniques? Let us know what you would like to see on our site by leaving us a comment below.