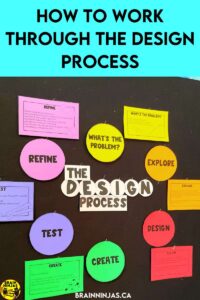
Here’s a quick lesson you can do with your students to learn how to use your Makerspace while teaching students to enjoy the process of solving problems. Problem-solving is a skill that needs to be taught, learned, and practiced. The design process uses simple steps to help alleviate frustration between creating, testing and refining. When all of your students have a common language, it can help facilitate conversations between them. Come learn how we use the design process in our classroom.
What is the Design Process?
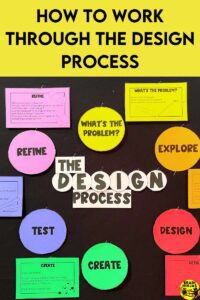
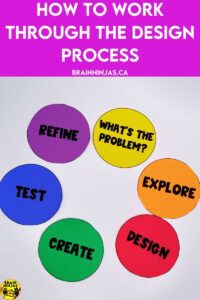
This is a simple step-by-step process for working through a problem. It starts by identifying the problem, exploring the materials, planning a design, creating a prototype, testing the prototype, collecting feedback from the test, and refining the design. The process can end here, or you can reenter the process with a new design or a refined design.
It’s like a song that never ends. And now that will be stuck in your head all day. 🙂
There are lots of versions of this process. These are the steps we’ve used with our students and have adapted the language for our students as we’ve developed our lessons. While we think it is important to use kid-friendly language, it is even more important to teach students vocabulary that they can use throughout life. We try to use accurate terms when possible-like the design process.
Why Use the Design Process?
If you model for your students the nature of problem-solving and design, your students will see that it constantly goes around and around in a circle. Knowing it’s a circle will reduce frustration. This is especially important for those students who fear failure and need everything to be perfect.
Students need to understand this is a process and sometimes the process is more important than the final result. The process is where and how learning happens.
When you first start the process, model each step. There is a complete lesson below for you to use. Under each stage of the process, you will see headings. Our Lesson refers to the lesson plan we’ve created within this post. Your Lesson refers to hints we’re giving you when you start to plan your own lessons that use the design process.
How to Use the Design Process
Your students will only be able to solve a problem if you give them a situation that will inspire them to come up with a solution. We designed a simple set of task cards full of simple problems you can pose to your students. You can find our Makerspace Exploration Tasks in our TpT Store ($USD) or BN Shop ($CAN).
Once you’ve gone through the lesson plan below, you can use these tasks to get you started in your classroom or makerspace. They are designed to focus on exploration rather than finished projects.
To get started give your students a selection of pieces or materials you have available. You don’t need to go buy a bunch of stuff. Use what you already have and ask for simple donations if you’re looking to expand your makerspace. If you’re looking for a list of things you can use, this blog post can help: What Goes in a Makerspace?
We used bottle caps, straws, tape, index cards and string. We also had scissors available. You can use these materials or use whatever you have in your Makerspace. The items should be flexible enough to let students explore. If you don’t have index cards, any stiffer paper will work.
To be clear, sometimes our entire classroom is our makerspace. You do not need a specially designed space to do this lesson.
Let’s Work Through a Design Process Lesson
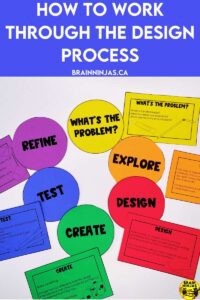
We created a simple lesson you can use with your students to teach the design process. This can be a great way to introduce the steps of the process. This is only a guideline, so feel free to make it your own.
This can be easier if you have our Design Process Poster Set that outlines this entire process. It’s perfect for a bulletin board near your makerspace. Students use it when working through their creations. Find the Design Process Poster set in our TpT Store ($USD) or BN Shop ($CAN).
Each stage of the process has questions that work for any project, so your students can work independently and still get valuable feedback at each stage. If you’re looking for more bulletin board ideas, be sure to read all the way to the end of this post as there are free items available.
What is the Problem?
Our Lesson: Tell students they are going to create a sign for a classroom makerspace. It should include the name of the makerspace. Every good makerspace needs a name given to it by students of course! It will need to stand up without touching the wall since we cannot nail, tape or glue it to the wall (you know, school rules).
Your Lesson: When you create your own lessons, the problem you give your students each time should be something that interests them. It should be challenging, but not impossible. Remember, your students might have ideas about problems that can be solved, so be sure to ask them.
Give Students a Chance to Explore
Our Lesson: Ask students to look at the materials that are available, but during this stage, they are not actually making the item (so no cutting or taping should be happening). This stage should include discussions with group members or looking at the materials and playing with them to get some ideas.
Many of our students asked for writing tools and we intentionally did not give them any as we wanted them to think about how to make the sign without any formal planning. Use your judgment, but if your students are asking for tools to plan, they are ready to plan.
Your Lesson: When you’re planning your own lesson, think about how students will get to “play with” the materials. Can they move them around the room? Can they try things out? Are there enough materials for everyone? How long will you give them to explore?
Keep the Planning Simple
Our Lesson: Give students some time with the materials to plan out what they want to do. This stage doesn’t need to be formal-as in they don’t need to draw or write it down. Save writing and drawing for more complex tasks.
This works best if you have a signal to let students know they can start creating. Sometimes we’ll have students let us know what their plan is and as soon as we’ve heard it, we let them move on to the next stage.
We rarely have students stuck at the plan. They usually have an idea, but just need a way to express it. Don’t make the planning phase an assignment or you’ll kill the excitement.
Your Lesson: When you plan your own lesson, have scrap paper and writing tools available so students can plan whenever they get a great idea.
Taking photos or videos is another great way to plan things out. Yes, pictures and video. Students can line things up or take a short video describing their ideas. Just talking it through can be very helpful for some students.
Creating is the BEST Part!
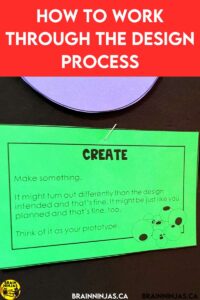
Our Lesson: Let students start creating. This should be the most exciting part and you’ll feel the energy.
They’ll make mistakes with their materials, so be clear about how waste will be handled before you start. Be clear about how many pieces of tape they’ll get and what happens when their tape is all twisted and tape together. Push your students to be creative (without sending them right over the edge and ruining the rest of your day).
Your Lesson: Think about how much time students will need and then add some time to tidy up. Add even more time to test, refine and share.
Time to Test
Our Lesson: Does the sign stand up like it is supposed to without falling over or needing other things to stand on its own? Does it have a name that you can read?
Avoid telling your students how to solve the problem. Instead, ask questions:
- What can you do to make this work the way you want?
- What have you tried so far?
- What would happen if you…? (Avoid solutions, just offer suggestions to make this stronger, make it balance etc.)
- You have more time, what are you going to add?
Allow students to give each other feedback. This is part of the process. Students will be able to use the feedback in the next stage.
Your Lesson: Build the testing time into your lesson. Make sure students know they will need to test whatever they make before they can complete the process. Some testing happens during the creation phase (and that’s ok). It will depend on the problem that is being solved.
Refine the Project
Our Lesson: Students use the test results and feedback from their classmates on how they could improve their sign.
If students need to return to another stage, let them. Sometimes students needed to plan more things, create something new or just add to their existing sign (usually the legs of the sign). We kept cycling through the stages until we were happy with the results.
Your Lesson: Remember, teach your students your makerspace rules as you work. How will they get materials? How will they clean up? Where can they work? How can they work? If you need some ideas on how to set up your makerspace try reading this post: How to Create an Inviting Makerspace.
Get these free makerspace posters to decorate your space. You can find them in our Resource Library or we can send them directly to your inbox when you sign up to receive our emails. This set also includes a set of ink-saving ones.
And Now You’re Ready to Go Through the Whole Design Process Again!
Now that you’ve gone through the Design Process once, it’s easy to see how you can apply this lesson to all your making-type tasks. We use this all the time in science.
If you’re looking for some of our different projects, check out our post about Project Based Learning which might give you some ideas on where you can use this process.
This is a bulletin board that stays up in our classroom year-round. We think it’s important for students to understand that creating and solving problems is a process and a skill we learn. When students get frustrated that their project isn’t quite working, we gently remind them they are stuck in the circle and eventually they will get out when they just keep trying.
We’d love to see your students’ makerspace signs. Send us a photo or share your thoughts in the comments below.

