We love to create art projects that use simple shapes but teach students different techniques. Heart art projects are perfect around Valentine’s Day, but they are a universal symbol that can be done any time of year. These art projects are some of the favourites that we use year after year. Best of all, they mostly use common materials you can find in most schools.
Check out these heart art projects that you can use to decorate your classroom, make gifts or share the love.
Batik Inspired Broken Hearts
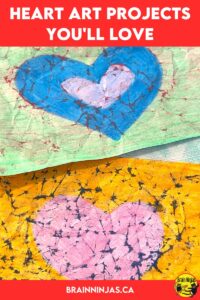
Batiking (pronounced BAA-teek-ing) is an Indonesian art form where fabric is dyed. Wax is used to cover the fabric areas where the artist doesn’t want the dye to go.
Materials: wax crayons, white lightweight paper (photocopy paper is good), watercolour paint, a watercolour brush, cup with water, paper towel, drying area
- Colour the paper completely with wax crayons. It is important to press firmly to leave lots of wax on the paper. It’s also important to colour the entire page.
- Gently crumple the page so that the whole page has lots of wrinkles in it. It is important to do this gently so it doesn’t rip the paper.
- Flatten out the paper, but it will likely still be wrinkly (and that’s okay).
- Using a wet paintbrush and ONE solid colour that contrasts the colours on the page, paint over the whole picture. The paint should soak into the cracks between the wax. If you coloured with a dark colour, use a bright colour like yellow or orange. If you coloured with a light colour use a dark one like blue or purple. Runny or watery paint will give you a better result than thick paint (which is why Tempera or acrylic doesn’t work).
- Gently pat the excess paint off the wax with a paper towel. Be careful not to rub it as it could rip the paper. A slightly damp (not wet) paper towel can help wipe off the excess paint.
- Allow it to dry. Do not iron the paper to flatten it. Instead, place it under a heavy object (great use for those math textbooks) once the artwork is completely dry. You can stack a whole class set, but when using wax crayons, they can transfer to other works. We keep scrap paper to place between the artwork to prevent any transfer.
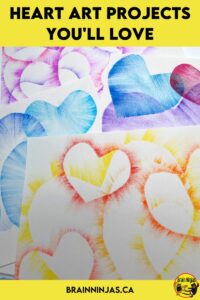
Stencils Heart Art Projects
This is a fairly simple project that uses markers and paper for a more permanent version of chalk or pastel.
Materials: transparency pages (plastic page protectors or plastic from lids that you can cut will also work, we even used scraps from the laminator), scissors, water-soluble markers (Mr. Sketch, Crayola and dollar store brands work great), tape, white paper (we recommend slightly thicker paper), tissues
You will likely get marker on your fingers when you do this project. It comes off with a good wash and some soap, but you could end up with “art teacher fingers” if you get the dark colours like blue or black on your hands.
Before you start: Make stencils for students (or you can have them make their own stencils. The goal is to cut out a heart so there is a stencil with a heart in the middle and then a heart-shaped stencil. It can be challenging for some students, but we gently folded our transparencies and cut out a heart shape. Since students each cut their own, we have lots of different heart shapes in lots of different sizes for the whole class to use.
Ninja Note: Students worked in partners so they could help hold stencils and the paper still.
Negative Space (no ink inside the heart)
- Use the piece shaped like a heart. Colour the plastic along the edge. Place the heart onto the paper with the marker side UP. Hold it in place firmly or use a piece of tape rolled on the back of the stencil to keep it in place.
- Use a tissue to gently pull the marker ink off the stencil and onto the paper. It should leave the outline of the heart visible.
- Remove the stencil.
- Choose another stencil and repeat the process using a different colour.
- Continue this process until the majority of the page is covered. We encourage students to use different sizes and position the hearts in different ways including going off the page.
Positive Space (the heart is coloured in)
- Use the piece with the heart shape missing from the page. Place the stencil on the page and tape it just enough so the page doesn’t move while you’re working.
- Colour the plastic along the edge.
- Use a tissue to gently pull the marker ink off the stencil and onto the paper. It should colour the inside the heart shape.
- Remove the stencil.
- Choose another stencil and repeat the process using a different colour.
- Continue this process until the majority of the page is covered. We encourage students to use different sizes and position the hearts in different ways including going off the page.
Patterned Hearts Art Project

This project can be adjusted to any shape in the middle, but it makes a stunning piece if students take their time with the pattern details.
Materials: black fine-tipped markers, white paper, watercolour paint, watercolour brushes, water, ruler optional, heart stencil (optional if your students need help drawing a heart).
- Draw a heart on the page. If using a pencil, start with light lines and then trace them with the fine-tipped black marker.
- Section the heart by drawing a few lines through the heart. We avoided columns or rows and tried to make the pieces asymmetrical.
- In each of the pieces of the heart, draw and repeat a pattern. Make a different pattern in each of the different pieces.
- Use watercolour paint to paint the background of the rest of the page. When done correctly, the heart will be black and white only. The background should be a solid colour. We allowed students to use a second colour if they were trying to make different tones for their background.
- Leave the painting to dry completely before ironing the paper on medium heat to flatten it.
Pastel Hearts
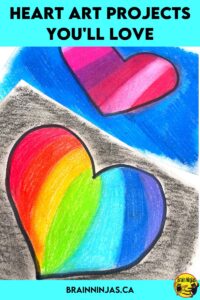
These brightly coloured hearts make a great display, especially against a black bulletin board. Heart work any time of year.
Materials: paper, oil or chalk pastels, tissue paper or tissues
- Draw a heart with the pastels.
- Colour the inside of the heart. Some students chose analogous colours (side by side on the colour wheel), some chose contrasting colours (opposite each other on the colour wheel) and some just chose colours they liked. Press firmly with the pastel, but hold the paper firmly to avoid crumpling.
- Use the tissue paper to gently blend the pastel by dragging the colour across the heart. Depending on how one blends, the colours could mix a bit or just soften. Pastel is not intending to have perfectly clean lines.
- Colour the background in a different colour. Use the tissue to blend the background so the entire paper is coloured.
Valentine’s Love Trees
All the instructions for this project can be found here. They are trees that use hearts for leaves, but they deserve their own special post with all the instructions.
Looking for More Art Projects?
We have several art lesson sets. Each set includes complete instructions to walk you and your students through the lesson, photographs of student examples, materials lists and reflection pages in English and French.
Artists of Canada: Find it in our TpT Store ($USD) or BN Shop ($CAN).
Landscapes and Geography Art Projects Find it in our TpT Store ($USD) or BN Shop ($CAN).
Indigenous Artists in Canada Inspired Projects Find it in our TpT Store ($USD) or BN Shop ($CAN).
Light and Shadow Art Projects Find it in our TpT Store ($USD) or BN Shop ($CAN).
Plants Art Projects Find it in our TpT Stor(4USD) or BN Shop ($CAN).
Winter Art Projects Find it in our TpT Store ($USD) or BN Shop ($CAN).
Christmas Art Projects Find it in our TpT Store ($USD) or BN Shop ($CAN).
Halloween Art Projects Find it in our TpT Store ($USD) or BN Shop ($CAN).
Upcycled Art Projects Find it in our TpT Store ($USD) or BN Shop ($CAN).
And all of our sets come in one big bundle which discounts all the sets. If we add any more sets or lessons, they’ll also be added to the bundle. You can learn more about the bundle in our TpT Store ($USD) or our BN Shop ($CAN).
Looking for Even More Art Projects?
We have several other posts that contain free art projects for your classroom.
Art Projects That Will Last All Year
How to Create Memorable Remembrance Day Art Projects
Simple Art Projects for Back to School
How to Make Christmas Art Projects to Give
Are You Avoiding Teaching Art? How to Fix That
Simple and Stunning Remembrance Day Art Projects
How to Connect Social Studies and Art
How to Bring Indigenous Culture into Your Art Lessons
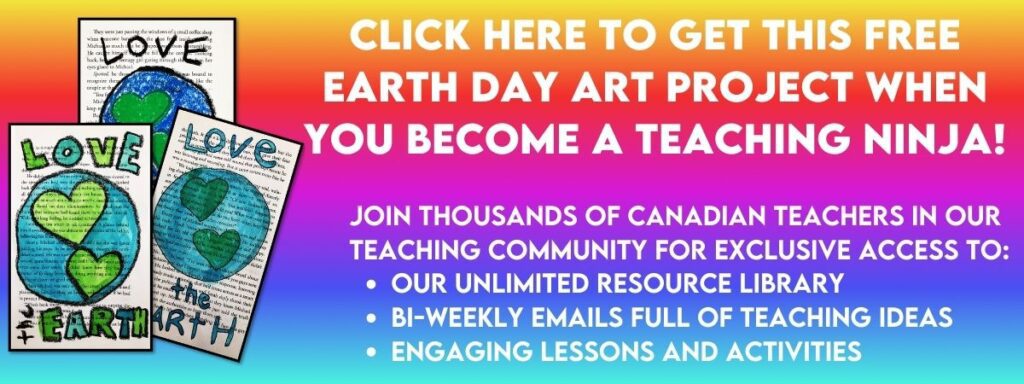
We also have this upcycled art project. You can apply the lesson to heart shapes very easily. If you’re already on our email list, you can find this lesson in our Resource Library. If you aren’t a ninja yet, we can send it to your inbox when you sign up for our email list.
Do you have a heart art project you love? We’d love to hear about it. Send it our way or give us a brief description in the comments below.