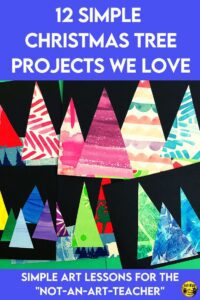
If you are an elementary generalist who teaches your own art, it can be challenging finding projects that look great, teach skills and aren’t so complicated YOU can’t figure them out. Don’t worry! We’ve got some great Christmas tree art projects for you. They use regular materials you’ll be able to find in your school and don’t take more than an hour or so to create.
In fact, we think you’ll probably create more than one because they are just so cute!
Looking for a new twist on Christmas tree art projects? We’ve searched high and low to find and test out some of our favourites and here they are just for you!
Each of these Christmas tree art projects can stand alone as a piece of art. Or, you can use them to make cards or plaques or to decorate your school during the Christmas season.
Here are some basic art skills we always teach our students:
When composing pieces like these, we often encourage students to use an odd number of objects, like three or five. There is something about odd numbers that the brain loves.
We ask students to have at least one part of their piece go off the page. This creates interest for the audience by making them imagine the picture continues.
Students are always given a page to use to practice the steps or skills before trying out their “good copy.” Keep lots of scrap paper on hand and let students try it out before giving them the good paper. It prevents a lot of tears later.
Give students direct instruction on how to use pastels and paintbrushes or how to complete specific strokes. Practice these on the scrap paper mentioned above.
Don’t forget to teach students how to look after the different materials and resources. Teach students how to wash paintbrushes properly and how to store materials when they are finished.
If you have been avoiding teaching art because of the mess, you need to read this post.
Let’s get started with some awesome Christmas Tree art projects
Triangle Pastel Trees
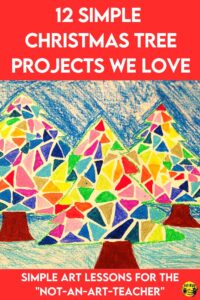
- On a piece of white drawing paper, use a green pastel to lightly outline the tree shape.
- Inside the tree, draw brightly coloured triangles, leaving white space (like a thick line) in between each of the triangles.
- Add a trunk for each tree.
- Colour ground around the bottom of the page so that the trees do not look like they are floating in the air.
- Add sky so that the whole page is coloured except for the white spaces within the trees.
- This project can easily be modified to use paint or markers, depending on the supplies you have available.
Painted Paper Trees
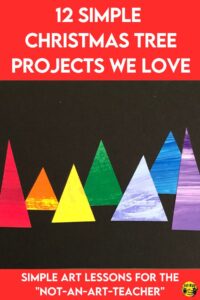
- Grab a bunch of construction paper or cardstock. This project is perfect for using up that faded paper or paper with misprints.
- Using Tempera paint to cover the paper. You can make swirls, stripes or patterns that cover the whole page. Have each student create one or two pages that use bright colours. Let them dry for a day or two before the next step.
- Cut out triangle shapes of various sizes.
- Have students exchange their colours so they have a variety of colours.
- Arrange these “trees” on a piece of black cardstock or construction paper so they overlap.
- For a variation, cut out a rectangular piece to use as the ground. These also look great arranged as a rainbow motif.
Recycled Paper Trees
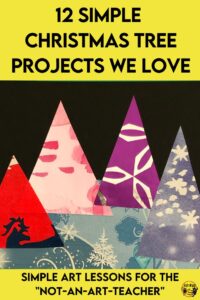
- Use old greeting cards, wrapping paper or scrapbooking paper to cut out triangles of various sizes.
- Arrange the triangles on black cardstock or construction paper to represent trees.
- Glue them on in an interesting arrangement.
- These make great greeting cards to send home to your families.
Button and Bead Trees

- Paint a piece of cardboard from a cereal box one solid colour. We find it best to paint the side from the inside of the box as the outside is usually glossy and it’s hard for the paint to cover it.
- Purchase small buttons and small beads from a dollar store, but if you ask your coworkers, there are probably lots floating around your school. We sorted ours by colour (well, the students did) so that the project used analogous colours.
- Attach beads and buttons with white glue in the shape of a Christmas tree. White glue is usually enough to hold them.
- These look great in a frame or on the front of a greeting card.
Snowy Bare Trees
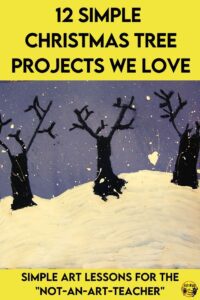
- On a piece of blue construction paper, paint a snow base to represent the ground.
- Use black paint to paint simple trees. We often talk to our students about using the letter Y to form branches. You can also use a black marker or pastel if painting isn’t an option.
- Once the painting is done, spray or splatter white paint over the painting to show snow. A great way to make splatter is to use a toothbrush dipped in white paint and run it over a piece of taut screen. If the spraying is too much for you, try dipping a Q-Tip in white paint and dotting it all over the drawing.
Crayon, Coloured Pencils or Pastel Squiggly Trees
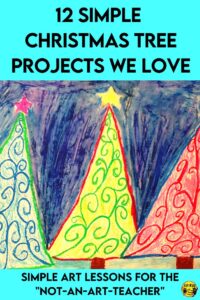
- Using the medium of your choice on a piece of white paper, draw triangle shapes.
- Inside each tree, draw curved lines in a pattern or design. We like to use swirls and curly qs.
- Fill the rest of the triangle with a different colour. You can use contrasting colours or analogous colours, but you’ll want the curly lines to stand out.
- Place a contrasting star on the top of each of the trees.
- Add a sky and ground to complete the picture.
Ribbon Trees
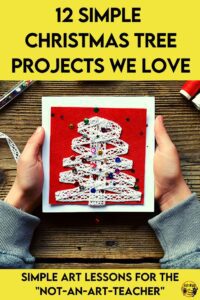
- All you need for this one is cardboard (like cereal box cardboard), paint and a ribbon.
- Paint the cardboard in a solid colour.
- Arrange the ribbon in the shape of a Christmas tree and glue it down with white glue.
- Add a few “ornaments” using small beads or buttons.
- A variation is to put the tree on a piece of fabric or felt instead of cardboard.
Winter Silhouette Trees
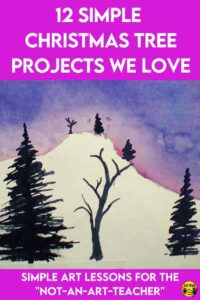
- Using a white piece of paper, use blue, purple and red watercolour paints to create an interesting horizon and sky. Leave the ground white.
- Once the sky is dry, paint the trees using black. Evergreens can be created by drawing a skinny triangle and then making branches that start narrow at the top of the tree and wide at the bottom. Poplar trees can be created using a stump that turns into a “Y.” Keep adding “y” branches to fan out the tree. Have students practice on scrap paper before using their good copy paper.
- Since snow is white, students often have trouble creating realistic-looking snow, so we encourage students to use a little bit of the dirty water to create shadows once the trees are painted on. This makes the snow look like it’s painted without actually painting the whole space.
Winter Forest Trees
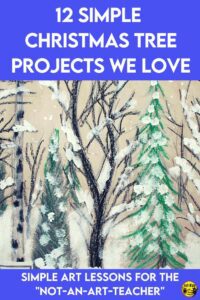
- Using a grey piece of construction paper, use black pastel to draw branches and tree trunks.
- Use dark green pastels to draw evergreen branches.
- Use white pastels along the bottom of the picture to show snow on the ground.
- Once the drawing is complete, use white paint to add snow to the branches with light dabs. Q-tips or the back end of the paintbrush can also be used for precision and small details.
- This picture is meant to be a little messy looking. There should be lots and lots of trees because it’s a forest.
Found Object Trees
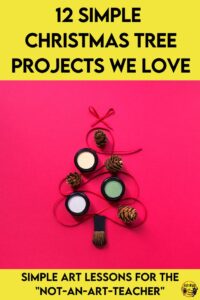
- Collect a bunch of little items like buttons, ribbons, bottle caps, lids and leftover craft materials from around your classroom or school.
- Paint a piece of cardboard with a solid colour. Cereal box cardboard works really well, but paint the cardboard side instead of the glossy side for best coverage.
- Arrange the found objects in the shape of a Christmas Tree. Use the ribbon to connect all the pieces together.
- Add details to “decorate” the tree.
- Glue all the pieces onto the cardboard using white glue or a hot glue gun.
- This makes a great Christmas gift. Add a string to the back of the project so it can hang.
- Make smaller versions as Christmas Tree ornaments.
Printed Paper Trees
- Grab a bunch of construction paper or cardstock. This project is perfect for using up that faded paper or paper with misprints.
- Paint the paper with one solid colour.
- Have students stamp the paper with a variety of objects such as: cotton balls, Q-Tips, paper towel or anything else that is a little soft and can be dipped in paint. Use a colour that will stand out on the solid colour background. Have each student create one or two pages. Let the pages dry for a day or two before the next step.
- Cut out triangle shapes of various sizes.
- Have students exchange their colours so they have a variety of colours.
- Arrange these “trees” on a piece of black cardstock or construction paper so they overlap.
- For a variation, cut out a rectangular piece to use as the ground. These also look great arranged using contrasting colours.
Ninja Note: The last time we did this project, we completely forgot to take pictures! But you can arrange the picture similarly to the project below. The stamped pages will create a similar effect.
Watercolour Triangle Trees
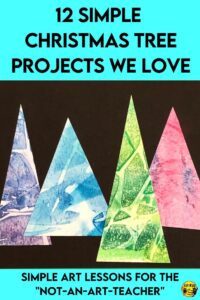
- Grab some watercolour paper. It does not have to be perfectly cut for this part of the project.
- Paint the paper with water so the page is quite wet.
- Add some watercolour paint. You can use one or two colours, but they should be analogous. They will blend together. If they aren’t blending, add a little more water and paint. Tip the paper so the colours touch.
- Cover the paper with a piece of plastic wrap. Smoosh it around a bit so the wrap bubbles and twists. Have each student create one or two pages. This will make unusual markings and prints in the paint.
- Once the paper is dry, remove the plastic wrap.
- Cut out triangle shapes of various sizes.
- Have students exchange their colours so they have a variety of colours.
- Arrange these “trees” on a piece of black cardstock or construction paper so they overlap.
- For a variation, cut out a rectangular piece to use as the ground. These also look great arranged using contrasting colours.
Remember, the difference between art and crafts is that art is subjective, while crafts all tend to work out looking the same.
Give students enough information to do the task, but remember they should all look different because students should have the freedom to create their own art.
These examples are just examples that show roughly what the projects might look like, but your students should feel welcome to add their own details. The examples are by no means meant to be the only way your students can create their works of art. We simply meant to use the examples as a way to explain the steps to creating the piece.
Are you looking for some Christmas crafts, art projects and activities?
Yes, these are crafts-not necessarily art, but they are still fun and allow students to create some pretty cute pieces.
- Save Time With this Christmas Art Collection: A roundup of all of our Christmas art projects.
- Fingerprint Art: Use the little fingerprints of your students to make all kinds of wonderful Christmas themed creations, like cards or Christmas tree ornaments, that you can hand out to friends or family.
- Recycled Paper Ornaments: Use leftover paper from newspapers, fliers, the copy room or magazines to create folded paper ornaments.
- Christmas Word and Logic Activities: These logic puzzles will keep your students busy during the craziness of the holiday season (and you’ll need the break). Find it on TpT or BN Shop.
- Wooden Ornaments: Use some wooden game pieces to recycle them into new Christmas tree ornaments.
- Recycled Can Characters: Collect metal or cardboard cans with plastic lids (like the one hot chocolate or coffee comes in) and turn them into adorable holiday characters that you can treasure forever.
- Recycled Materials: Christmas Wreaths: Create interesting wreaths by using recycled green fabric.
- Art Lessons All Year Bundle: This is a whole bundle of our best art projects. Teacher instructions, photos of student examples, reflection pages in English and French and suggestions on how to modify for students or materials are all included. Find it on TpT or BN Shop.
- Recycled Cork Ornaments: Use up some corks to make adorable Christmas ornaments.
- Christmas Art Projects: These projects make great gifts or decorations. Find it on TpT ($USD) or our BN Shop ($CAN).
Are you looking for a lesson you can do that isn’t too Christmas-y? Try our Snowmen Project lesson by joining our email list. You’ll also get access to our Resource Library, full of other resources.
Art Projects That Will Last All Year
Simple and Stunning Remembrance Day Art Projects
How to Create Memorable Remembrance Day Art Projects (different projects)
Simple Art Projects for Back-to-School
How to Calm the Chaos in December
Do you have other favourite Christmas tree art projects? Let us know, and we’d be happy to experiment and try them out. Leave us a comment below.


