Are you tired of wasting your valuable time searching high and low for the weather lessons you need for your upper elementary students? There are so many weather activities all over Pinterest, but we find most of the weather lessons are for preschoolers- not exactly what our students need.
We focus on creating materials for teachers who teach the same things to the same age we do. Most of what we create comes from not being able to find what we need. Weather worksheets are just plain boring and not at all aligned with our teaching style, so we’ve created weather experiments and activities that we use in our classroom. We want to help you by putting everything in one place so you don’t have to use all your time collecting lessons from all over the place.
Let’s talk about your teaching style. Are you a stand-and-deliver teacher, or do you let students experiment whenever possible? Now, the weather is one of those units that is a little more challenging to experiment with because as much as we would like to, we can’t control the weather.
But, there are lots of experiments for kids that are related to weather. What kid doesn’t love an experiment (especially instead of a worksheet)?
Here are some simple experiments for kids that you do in your classroom with very few resources:
Measuring Temperature
One of the easiest experiments is to measure temperature in different parts of your school or classroom. You would need a set of basic thermometers in your correct measurement of Celsius or Fahrenheit. We found basic ones at our local hardware store. Place them around the room/school a few hours before you need them with a little sign that says you’re measuring temperature (so people don’t move them before you get back). Collect the measurements and compare the results to look for patterns. Are there certain areas that are warmer or colder?
Weather Concept: Warm air rises and as it cools, it falls back toward the ground. Often heaters against the walls or floorboard are the source of the heat, so the air that has fallen right in front of the heater would be the coolest air in the room. This circulation of air is called convection.
Create Condensation
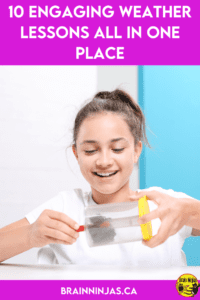
This one is very easy. Fill a plastic water bottle 3/4 way up with water and put the freezer the day before this experiment. At the beginning of your science lesson, take the bottle out of the freezer and leave it on a table where it will start to thaw. As it thaws there will be beads of water on the outside of the container.
Weather Concept: Condensation happens when the air on the outside of the container is warmer than the air inside the container. The cold container “collects” moisture out of the air (on the outside of the container) and this collects on the surface of the container.
Low and High Pressure
This is a tricky concept for students to grasp, but with this little demonstration, it’s pretty clear. You will need a fan, two pieces of paper and two students to do this experiment. Place both pieces of paper side by side with the fan aimed at them. If you turn on the fan, the papers will blow off the table. Ask one student to place their hand flat on one of the pieces of paper. The other student will place one finger very lightly on their paper (as if they are barely touching it). Now turn on the fan. The student holding on to the paper with their whole hand will be able to keep the paper on the table while the student barely holding on will have the paper slip away. This is an example of high and low pressure.
Weather Concept: High pressure means the air molecules are packed together very tightly and do not allow moisture to travel through the sky easily. Clouds can’t form. When there is low pressure, the air molecules can move around, allowing more moisture droplets to collect together into clouds. Low pressure allows the air to move, so this is also when we get more wind.
The Water Cycle
You might have seen this one all over the internet. Get a zippered plastic bag. Draw with a permanent marker onto the bag to label each of the parts. On the bottom: collection. Top: condensation. Left side: evaporation. On the right side: precipitation. Place a little bit of water in the bottom of the bag and zip it shut. Tape it to a sunny window and wait a few days to see what happens. You should see water droplets forming on the inside of the bag. As they get too heavy to just stay hanging onto the surface of the bag, they start to fall back down to the bottom.
Weather Concept: Water travels around the planet through a process of evaporation (water droplets leave the surface to form clouds in the sky), condensation (water droplets collect into clouds), precipitation (droplets fall back to Earth) and collection (water collects across surface areas in lakes and rivers). This is a very basic model of the water cycle. There are other ways water travels through our planet (like transpiration), but this is a great introduction for your students.
Build an Anemometer
Using 4 small cups (like Dixie cups), 4 straws, a pencil, a little ball of modelling clay, and a straight pin challenge your students to work in groups to build a weather device that will measure if the wind is slow or fast. This is called an anemometer.
Glue the cups to the end of the straws so they can catch air. Cross the straws in a T and glue them together. Use the straight pin to poke through the center of the straws into the eraser on the pencil so that the straws can spin. Use the modelling clay to hold the pencil standing up.
Rather than telling your students how to do this experiment, challenge them to see if they can create something that works. They will come up with lots of different ideas and not all of them will work, but that’s the point. At the end of the experiment show them a model that works properly by using a fan to show how the anemometer spins when the wind picks up.
Weather Concept: An anemometer measures wind speed. The faster the wind blows, the faster the cups on the anemometer will spin.
Weather Vane or Sock
Have your students create a weather vane. Think of a flag. When the wind blows it shows the direction the wind is blowing. Ask students to come up with ways to show which way the weather is blowing by building and experimenting with a device. The simplest way is to place a straight pin through a straw so that it spins. Poke the pin into an eraser so that it stands freely. Place a little paper flag on one end of the straw. When the wind blows, the flag will blow away from the wind. Use a fan or blow really hard to test it out.
Weather Concept: Wind direction is measured by the direction from which it travels. A weather vane helps decide which way the wind is blowing. These are commonly seen at airports.
Ninja Note: One year, we let students brainstorm for a few days before doing this experiment in class. They were allowed to bring their own materials for the build day. One of the best windsocks we ever saw was a student who stapled a hotel shower cap to a meter stick. It worked perfectly, and he was nice enough to bring one shower cap for every student in the class. His mom was the manager of a local hotel. If you ever want a great class picture, put shower caps on the whole class and pose with a smile.
What else can I do to teach weather concepts to my students?
Record Weather
Before you even teach this unit, take some time to record the weather in your area for a few weeks or days before starting the official teaching.
Look Up Weather Records
Try searching for weather records for your area. What is the coldest day in history? The warmest? What is the weather usually like? What is a rare event? Have your students make a chart. Maybe have students research weather records for different places across Canada and compare the results.
Research Extreme Weather Events
Students are fascinated by extreme weather. Make a list of weather events that your students can research. What was the weather like? What caused it? When and where did it happen? Maybe have students each create a slide for a larger slide show. Some interesting Canadian research topics might be:
- Hurricane Hazel 1954
- Ice Storm Quebec 1998
- Edmonton Tornado (Black Friday Tornado) 1987
- And check out many more on this list from Environment Canada
Giving students the chance to experiment and research helps deepen their understanding of concepts and makes learning fun.
Need More Weather Lessons?
We wrote an entire weather unit and put all of these lessons together in one giant bundle, along with so many more. You can find the Weather Unit Bundle in our TPT Store ($USD) and BN Shop ($CAN).
We know how easy it is to get sucked into the online vortex of lesson plans so we’ve worked diligently to make sure these lessons are worth your time. They do not need to be purchased as a bundle, but with the above link, you can preview each of the items we’ve written in more detail.
There is an outcome in our curriculum that asks students to test fabric and decide which materials work best in specific weather conditions. For years, all this meant for us was to check to see if students were dressing appropriately for the weather outside-not exactly fascinating for students. Instead, we created weather experiments with our students. They loved them, and you will too. These specific weather experiments are found in our clothing and fabric testing product, and we have never found anything like them anywhere online-so they’ll be one-of-a-kind lessons that will stick with your students.
Weather lessons come in a wide variety of choices of how students learn: drawing, role-playing, designing, readers’ theatre and so many more. We’ve tried to create lessons that teach students to use the scientific method or creative thinking skills in a real-world way.
In our weather unit, you can find all of these topics taught through engaging lesson plans that come with everything you need to know how to teach them:
- Clouds (Find in our TPT Store and BN Shop)
- Precipitation (Find in our TPT Store and BN Shop)
- Weather patterns and climate, including seasons and air pressure (Find in our TPT Store and BN Shop)
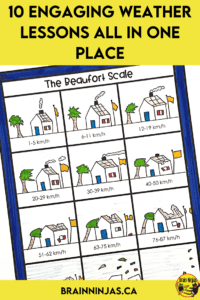
- Wind speed and direction (Find in our TPT Store and BN Shop)
- Weather Instruments (Find in our TPT Store and BN Shop)
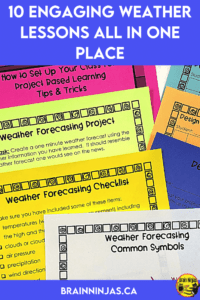
- Weather forecasting (Find in our TPT Store and BN Shop)
- Fabric and clothing testing (Find in our TPT Store and BN Shop)
And support materials are included:
- Reading passages about weather (Find in our TPT Store and BN Shop)
- Interactive review game (Find in our TPT Store and BN Shop)
You can find the Weather Unit Bundle in our TPT Store and BN Shop.
And we have Weekly Reading Comprehension Lessons about weather.
Weather Wonders on TpT ($USD) or our BN Shop ($CAN)
Weather Forecasting on TpT ($USD) or our BN Shop ($CAN)
Tornados on TpT ($USD) or our BN Shop ($CAN)
Permafrost (You can try this one for free) on TpT ($USD) or our BN Shop ($CAN)
Fabrics & Fibres on TpT ($USD) or our BN Shop ($CAN)
Climate Migration on TpT ($USD) or our BN Shop ($CAN)
Do You Teach Science?
If you teach science, you might also be interested in some of these posts:
- Engaging Electricity Lessons to Shock Your Students
- How to Learn About Wetlands Without a Pond
- How to Grow a Healthy Classroom with Plants
Does having all the resources in one quality bundle suit you better or do you prefer to hunt and find the different activities you need when designing your own lessons? Let us know your preferences in the comments below.


