You’ve decided to have a makerspace because you understand the value of the learning that can take place. If you aren’t quite sure, maybe you should go back to our post: Why Should You Build Makerspaces Immediately? It talks about the reasons a makerspace can be valuable in your school or classroom.
What should you put in it? Anything you want. Start small. We put out origami paper and a book during the first week just to see what would happen. (Turns out the answer to that question is lots of paper frogs.) But seriously, we made a list of potential makerspace supplies.
Before you get into buying makerspace supplies, you can get your makerspace started with just a few items. Read our post called How to Create an Inviting Makerspace to head in the right direction.
Not everything has to cost money, but a start-up fund helps. We used our small funds to buy some containers and a few tools. Most of the rest of our items were donated. We posted a wish list to our school website and were amazed at the generosity of our parent community. Don’t underestimate your local stores, too. Many retailers were happy to donate leftover store window display parts and even a set of tools for our students.
You don’t need to have everything all at once to get going. You just need a few scraps and a couple of ideas and technically you have a makerspace.
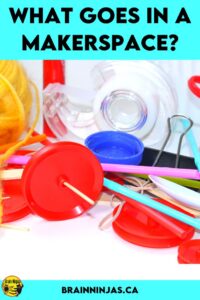
What should you put in your Makerspace?
- Containers to hold materials (shoe boxes can work)
- Shelves to display materials or store projects in progress.
- Workspace for Makers to use to create ( such as a table or designated floor space)
Consumable Makerspace Supplies
These items get used up or taken away with maker projects.
- paper
- thread
- yarn/ribbon/string
- tape: masking, painter’s, duct, scotch, Washi
- pipecleaners
- twist ties
- glue/hot glue/glue sticks/white glue
- nails
- screws
- nuts and bolts
- pieces of wood, dowels
- Fabric/cloth scraps/felt/recycled clothing/socks
- Cardboard
- tin cans
- Food container lids/food containers
- coffee stirrers
- straws
- paper/plastic plates/cups
- cardboard rolls
- bottle caps
- corks
- jars
- buttons
- shells/pebbles/rocks
- Origami paper
- chart paper
- ModPodge
- paint
- shoeboxes
- kitchen utensils (spoons, knives, forks)
- sponges
- dismantled toys/pieces of models/broken toys or board games that can be repurposed
- tin foil
- parchment paper
- wax paper
- sequins/rhinestones/aquarium rocks
- scrapbooking paper
- wrapping paper
- old holiday cards
- pompoms
- tissue paper
- toothpicks/skewers
- cotton swabs
- cotton balls
- notebooks/sketchbooks/paper for planning
- egg cartons
- drink trays
Non-Consumable Makerspace Supplies
These items stay in the makerspace and are used by all makers.
- glue guns
- hammers
- screwdrivers
- pliers
- hand drills
- wire cutters
- toys: Lego, Mega Blocks, Tinker Toys, Lincoln Logs, Puzzles
- Keva planks
- crayons
- markers
- coloured pencils
- rulers/measuring tapes
- rubber stamps/stamp pads/ink
- stencils/rubbing plates
- sewing needles
- knitting needles
- looms
- How-To Books
- robotics: Sphero, MaKey MaKey, Little Bits, Ozobots, Dot and Dash, Lego Mindstorms, Cubelets
- cameras or devices to record progress
- paintbrushes/paint sponges
- washcloths/cleaning materials
- magnets
- safety gloves/goggles
- clamps to hold items while glue is drying
Organization of Your Makerspace
Need a way to organize all these materials? Consider our makerspace label set. They are simple, yet colourful and come in two different sizes so they will fit your containers no matter what. Find the Makerspace Labels in our TpT Store ($USD) or our BN Shop ($CAN).
We are very fortunate to have a large counter in our classroom that has a set of cupboards underneath. We keep most of the materials in those cupboards and students work right on the counter. Sometimes the entire classroom becomes a makerspace when we’re all working on projects.
If your school is lucky enough to have an entire room for a makerspace, you can set out areas designated for specific types of tasks. Permanent and larger tools can be set up and kept ready to use.
Makerspace Supplies That Go Beyond Simple
If your makerspace is for school-wide use, you might be able to think of some bigger items that will be used by many people. These could be items that need a little fundraising because they do cost a bit more.
- a Cricut or Silhouette cutting machine along with the materials to cut like vinyl, cardstock or fabric.
- 3D printer/printer materials
- power tools like drills
- soldering irons
- cameras or devices. Use them to document projects or run items like robotics/printers.
- ideas. We have a set of Makerspace Exploration Task Cards always available in our makerspace. Students never run out of ideas. Find them in our TpT Store ($USD) or BN Shop ($CAN).
The biggest thing your makerspace needs: a set of expectations
A simple set of maker rules makes all the difference. We keep our expectations simple and very clear:
- make a mess, but tidy up after yourself so the makerspace is ready for the next person using it
- ask before you use something (so you don’t accidentally use someone’s materials or destroy someone’s project)
- have fun, but be safe. If you hurt yourself, tell an adult right away.
Your students should be the keepers of the makerspace.
Teach your students to clean and organize the makerspace (as in where you want everything to go). Reward them for looking after it by adding new supplies or giving them more time to work in the space. There is no reason you should have to do the cleaning and maintenance. Children are great at sorting and making sure things are back in place, so give them the opportunity to be responsible.
You might choose to make this one of your classroom jobs, but we have found the best (and easiest) way is to simply have the students using the space be the ones to clean it up. We purchased a few little hand brooms, some cleaning gloves, a few cleaning cloths and a spray bottle (which only has water but we told the kids it’s cleaner). They love cleaning up the space.
Kids decide how newly donated materials are stored in the makerspace. Sometimes this means other items need to be packed up or recycled to make room and sometimes they choose to use up some items before adding the new materials.
The types of projects you do will decide the materials you need.
Makerspaces don’t have a set of rules for how they are set up. Generally, we have two types of projects: Make & Break and Make & Take.
Make & Break: These are projects students work on using materials that will remain in the makerspace after the project is over (for example, Lego). Students take apart all the pieces when the project is over and return them to the makerspace. Most of these items cost money, so they stay.
Make & Take: These are projects where students can take all the pieces home with them. These are usually inexpensive items that were donated specifically to be used up. Most of these items are recycled pieces that have been donated, so they can go.
Grab These For Your Makerspace
We make a simple set of posters that we use in our makerspace just for decorations (but they have a cute message). You can download them for free by joining our email list. You’ll get our emails full of teaching tips and engaging lessons, as well as unlimited access to our Resource Library. If you are already a member of our email list, you can find these posters in the Resource Library.
We also have a set that features the Design Process. If you’re looking for more information, we have a blog post called How to Work Through the Design Process which is helpful for creating the growth mindset needed in a makerspace environment. Find the Design Process Posters in our TpT Store ($USD) or BN Shop ($CAN).
Just remember, your Makerspace is whatever you decide. Ask your students what materials they would like to use. You don’t need to worry about coming up with ideas; your students already have lots and all you have to do is give them permission to explore.
We can’t wait to see all the wonderful things your students build! If you know something we’ve missed, let us know about it in the comments below.

