Do you need some convincing about how you can effectively use task cards in the classroom? Do you like the idea of task cards but don’t have the time to make them? All that printing, laminating and cutting can look like it’s not worth your time. Well, we have some solutions to get the most out of task cards for your students in the least amount of time for you. Keep on reading to find out how we use them and why we think they’re so valuable.
The Downside to Task Cards and the Solutions
They’re Hard to Differentiate
If you are using the same set of task cards for all of your students, you’re not able to differentiate for them easily.
The Solution: Why are all of your students using the same task cards? Chances are, they aren’t all working at the same level, so they should be doing different levels for their task cards or altogether different cards. Use different sets for different students. They can all work at the same time but on their own work.
It’s Just a Worksheet
Yes, most task cards are just worksheets chopped into individual cards.
The Solution: There is a time for practice and reinforcement, particularly in math or when practicing skills that require a little more repetition. Use task cards to practice skills in place of worksheets.
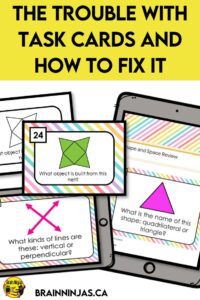
Too Much Work to Prepare
Printing, cutting and laminating takes time and work.
The Solution: There are lots of times we don’t have time to create individual sets of task cards. One shortcut is to leave the cards as a page and just throw them into a plastic page protector. You can store the pages in a binder.
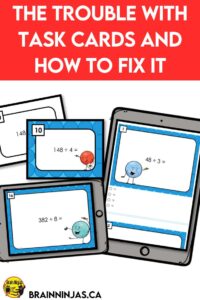
Another solution is to use digital task cards so no printing is needed. Just place the link on your classroom website or Google Classroom. All of our task cards come with paper, Google Slides and Google Forms versions.
Too Much Marking or Grading
Nobody has time to mark all those pages of answers.
The Solution: Truth-we never mark the work our students do on task cards. They mark their own work-honour system of course. We ask students to prove they can do 4-5 questions and then the rest they can do on their own. We print the answer pages and hang them around the room so students can check their own work. When they get questions wrong, they come to work with us to figure out where they went wrong.
The only time we “grade” the task card work is when we are specifically working with students and checking their understanding.
But our Google Forms version comes with each set of task cards that we sell, and they are self-grading.
They Take Students Too Long to Do
Some students take forever to get all the questions done.
The Solution: Is there a rule that your students need to do every single question? No. Make it interesting. Give your students a certain number to complete, such as do any five correct consecutively and then you’re done. Or only do even numbers (odd numbers). Or complete multiples of 3.
Make Task Cards More Than Just a Worksheet
Speaking of worksheets, we have a whole post about games you can play with them.
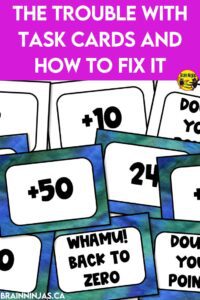
Make Kids Move
Spread out the task cards or hide them around the room. You’d be surprised how much just moving around the room while students are working can energize them.
Involve Your Students
Our students like to hide them in challenging places like taped to the bottoms of tables, chairs or desks, up high like on the ceiling or around the top of the bulletin boards. We give each student a card or two and ask them to hide them. This way all the cards are hidden in just a few minutes (so we don’t have to set them up). Our students also collect them all at the end of the activity (so we don’t have to clean them up).
Create New Cards
After your students are done completing the task cards assigned to them, have them create new cards for their classmates.
Use Them in Lines
You know how sometimes your class has to wait in a line (outside music, waiting to go out for recess)? Well, having cards ready to go means you can quiz your students while they are standing in line. Hand out the cards along the line and they can hand them back as they answer them.
Use Them as Flash Cards
Put the answers on the back so students can self-check their own answers at a station, centre or wherever else they are practicing with them.
Use Task Cards in Games
Replace game cards with task cards or add them to board games. If they get the question right, they get a turn on the game. If it’s incorrect, they lose their turn. We’ve used these in games like Sorry, Jenga and Monopoly.
Use Them As At the Door Questions
Task cards are questions that are ready to go at the door anytime, so hand them out on their way in the door to answer by the time class starts. Questions that can be answered mentally can also be used as exit slips as long as they don’t hold up the dismissal line.
Change How Students Answer
If you have whiteboards or even desks/tables with whiteboard markers, have students answer and then hold up their answers. Just be sure to tell them when to share their answer (or you’ll have the early finishers sharing before others are done thinking).
Give Students the Answers
Give students all the answers and have them figure out which cards they match.
Students Mark the Answers
Give students a completed answer sheet where most of the answers are correct. Have them figure out which ones are incorrect and what the correct answer should be.
Use Task Cards as a Quick Assessment
Use the questions from the cards as a quick assessment of a single student or a small group.
Turn Task Cards Into a Game
Scoot Version 1
Place one card on each desk. Students move from chair to chair, answering the question on each desk. You may want to have a set amount of time so that students don’t get bunched up anywhere. Students answer on an answer sheet.
Scoot Version 2
Give each student one card. They pass the card to the next student when they have finished the question. You may want to have a set amount of time so that cards don’t pile up anywhere. Students answer on an answer sheet.
Digital Scoot
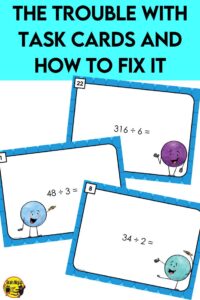
You can use a set of digital task cards by placing one question on each device and then having students move from device to device to answer them. You may need to adjust your power options so the devices don’t go to sleep while they aren’t being touched.
Quiz, Quiz Trade
Write the answers to your task cards on the back of each card or really small on the corner with a Sharpie (whiteboard marker will take it off later). Each student is given a card. They find a partner, ask the question on their card, and check the answer, the other person asks their question, checks the answer and then trade the cards. Both partners go off to find a new partner and the game repeats. Continue the game until students have asked several questions or they’re getting to “that point” when there is less engagement.
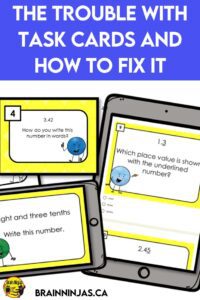
Try this free set of Decimals Place Value Task Cards. You can find them in our Resource Library or we can send them directly to your inbox when you sign up for our email list.
Use Task Cards to Play Whamu!
What in the World is Whamu?: This is a classroom favourite and it is pronounced Wham-ooo! Rhymes with shoe. In fact, over the years it has been altered by our students turning it into the awesome current version and it is a mix of games we’ve found and tried over the years. The game used to be called Wham-You, but a spelling error of Whamu changed the pronunciation one year and it stuck.
This game works with any printed set of task cards that has at least 24 questions. You can find a bundle in our store.
Divide your class into two even teams. Aside from the number of students, also think about ability levels. Give each team the tools they might need to solve the questions on the task cards (like whiteboards, markers or manipulatives).
You can get your own version of this game including the cards and rules by signing up for our newsletter. You will get access to our free Resource Library where this game and lots of other treats are offered.
To set up the cards
Place a point value card behind a task card. Place a number card in front of a task card. The number on the task card does not need to match the number of the question or the point value (this way it is random for students). Repeat this until you have 24 different task cards set up with their points. We use a pocket chart to set all the cards in.
To Play
Choose a team to go first. The team chooses one player to represent the team for this round. The player chooses one card by identifying the number they want. They are asked the question on the task card and are given a set amount of time to work out the answer.
If they get the question wrong, the turn is over and the other team gets to play.
If they get the answer correct, they get to choose to “keep” or “give away.” Keep means whatever the point card says, happens to the team that got the question correct. This could mean more points, less points or another surprise. Give away means the card plays for the other team. It could also mean more points, less points or something else.
The point cards in our sets include positive points, negative points, doubling, dropping to zero, giving all the points to the other team and chances for another turn.
To win
The game continues until all the task cards are used )or you run out of time). The team with the most points at the end of the game wins.
We have plenty of task cards available in our store to use for this game. They are available in both paper versions and digital versions. The paper versions come in colour sets and ink-saving sets.
Where to Store All Those Task Cards
Yes, sets of laminated task cards fill an entire drawer in our desk. We choose to keep the ones we’ve printed on cardstock and laminated. Some of our sets that have stayed “as printed” are stored in binders. We might turn these into individual cards later or we can easily keep them in the binders as they store really easily.
Some people use photo boxes to store their task cards and these are great, but honestly, we have so many, that a rubber band around each set works just as well for us.
Since creating more and more digital cards, we’ve stopped printing and storing as many sets of cards.
Keep subject areas together so they are easy to find and keep a title card on the front. Even a sticky note works! Try this free set of Geometry Task Cards. You can find them in our Resource Library or we can send them directly to your inbox when you sign up to be a ninja.
Hopefully, this has convinced you of some of the value that task cards can provide in your classroom. While they shouldn’t be the only thing you’re using, they can be a tool that helps students reinforce their learning or help you formatively assess their understanding.
We even use task cards that are open-ended! You should check out our post that includes information about using task cards in our makerspace How to Work Through the Design Process
Do you have another way you use task cards? Let us know in the comments below and we’ll add it to our post!

