We love creating collaborative posters. They are so much fun to make, but our students also love to create them. Of course, we have made over one hundred different designs and nobody is going to have the time to use them all. But, there’s more than one way to use a collaborative poster. Come learn some of the different ways you can use them (and spoiler alert–they aren’t more complicated and still don’t require much prep).
What is a Collaborative Poster?
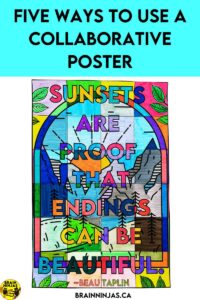
Before we get too far, we need to clarify what a collaborative poster is. by definition, it’s any time students work together to create a poster. The difference between our posters and some of the others out there is that we offer differentiated options. Each of our poster sets comes with 18, 24 or 36 pieces. This means you can differentiate for your group. We also include follow-up activities and a colouring page of the poster, so you can incorporate learning into the activity. No admin will be able to say it’s a waste of time because we’ve built the learning in.
Some of our posters are vertical to fit on your classroom door and others are horizontal to fit on a more traditional bulletin board.
Some people might ask, isn’t it just colouring? Sure. Not all students like colouring, but it does help build fine motor skills. It strengthens hand muscles. For many students, it’s calming. We have noticed a dramatic drop if penmanship, so colouring is another way to help students develop skills to control their writing. Another benefit is that it is screen-free. Our school has been pushing back on technology to help students develop other skills. Your students can chat and learn social skills.
We have so many other reasons collaborative posters can benefit your students in our post How to Use Collaborative Tasks to Create Classroom Community.
What Are the Different Types of Collaborative Posters?
We create three main types of collaborative posters. If you are looking for our collaborative poster categories, you can find them in our TpT Store ($USD) or our BN Shop ($CAN). We have a few examples listed throughout this post, but if you’re looking for a specific topic, the searches in our store may be faster.
Content: For Teaching
Content posters teach or introduce specific concepts. For example, we have several science-related posters. These can be used any time of year, but we use them while we’re teaching specific units. We have many more science and social studies-related posters than the ones listed here. Find more in our TpT Store ($USD) or our BN Shop ($CAN).
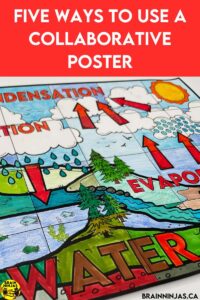
The Water Cycle Find it in our TpT Store ($USD) or BN Shop ($CAN).
Earth’s Spheres Find it in our TpT Store ($USD) or BN Shop ($CAN).
Sacred Plants to Indigenous People Find it in our TpT Store ($USD) or BN Shop ($CAN).
Holidays and Seasonal
We have several posters to celebrate or observe different holidays, events or seasons. These are generally only used during that specific time of year. We have so many more holidays, seasonal and Canadian events like Remembrance Day available in our stores. Find more in our TpT Store ($USD) or our BN Shop ($CAN).
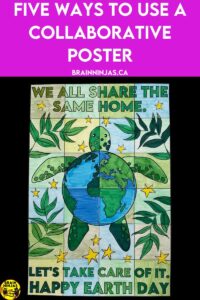
Earth Day Find it in our TpT Store ($USD) or BN Shop ($CAN).
End of the Year Find it in our TpT Store ($USD) or BN Shop ($CAN).
Pink Shirt Day Find it in our TpT Store ($USD) or BN Shop ($CAN).
Evergreen
We have some posters that can be used any time of year. Many of these are quotes, inspirational messages or topics that are relevant all year long. Find more in our TpT Store ($USD) or our BN Shop ($CAN).
Working Together Find it in our TpT Store ($USD) or BN Shop ($CAN).
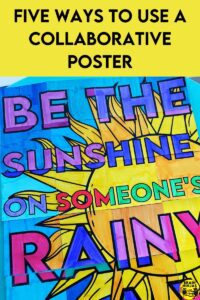
Be the Sunshine (Kindness) Find it in our TpT Store ($USD) or BN Shop ($CAN).
Seven Teachings Find it in our TpT Store ($USD) or BN Shop ($CAN).
Ways to Use a Collaborative Poster
Once you’ve decided which poster you want to use, now you get to decide how you want to use it.
Whole-Class
This is the simplest way to start with a poster. We use this for content posters so we can use the poster as an anchor chart during our lessons.
Decide if you need the 18, 24 or 36-piece set. Print the pieces you’ll be using. Hand out one page per student. Before they start colouring, decide which type of media they can use (like markers, crayons or pencil crayons). Students colour their pieces. If someone finishes early, they start on another (assuming you have an extra piece or two). We find that telling students who finish they will need to colour a second if they rush, it slows kids down enough to do a good job.
You can choose to have students cut out their own pieces or have an adult use a paper cutter if you want to speed it up. Cleaner edges are easier to assemble, but we’re also advocates for letting students do the work. Have students assemble the poster or select a few helpers to put it together.
You can choose to tape the pieces together or staple them directly to a bulletin board.
Early Finishers
One way to make a poster without having to make a poster is to put the pages of the poster you want to use in a folder and let students work on them between other assignments. We use holiday/seasonal posters that we don’t want to use for the whole class or evergreen posters. Generally, we only have one poster on the go at a time so they don’t get mixed up.
The one flaw with this is that a piece could potentially go missing. To prevent this, we put a piece of lined paper on the front of the folder. Students write their name and the page they have (like Trina has A3). When they return the coloured piece back to the folder, they put a checkmark next to their name. This just makes it easier if Trina loses her page. You can just print the one page again without needing to assemble everything to figure out which one is missing.
You can assign a few students to cut or assemble the finished poster when they have finished their other work.
Mystery Creator

This is a totally different spin on creating a collaborative poster, but it can be lots of fun.
First, decide which type of poster you’ll use. We typically use a holiday/seasonal or evergreen poster. Print the pages and give students their page, but ask them to keep it a secret.
Tell students they can use any materials they want to complete the picture, but it should show off their personality. Some students just coloured the page. Others painted it or made a mosaic. Some students used patterns to fill in the spaces. We let students take their pieces home or we allowed students to create walls with binders to hide their work. An unexpected result was twenty minutes of complete quiet while students worked and protected their pieces from prying eyes.
Have students hand in the piece with it cut out and the page number (A3, G4 etc) on the back. They don’t need to put their name on it.
If there are extra pieces, your early finishers can complete them or, you can ask other staff members that work with your students to complete them. For example, the administration, custodian, music teacher, French teacher, librarian and educational assistants. If these people can’t be in your classroom while students start assembling the poster, have them write their names on the back of the pieces.
Put all the pieces in order from A1 to the last piece. Hold up the first piece (keep the back hidden) and ask students to guess who created it. Once they guess correctly (or the creator admits they made it) hang the piece up. We usually guess about 4-6 a day meaning it takes almost a week to get all the pieces up.
If you put it on a bulletin board outside your classroom, other classes can also try to guess who created the pieces.
We did this one at the beginning of the year. The poster was put on our door for Meet the Teacher night and we asked parents and guardians to see if they could guess which piece belonged to their child.
If your staff create a poster, you can have a contest to have students guess which staff member created each piece as a fun contest.
A-Piece-A-Day
We use holiday/seasonal or evergreen posters to create a piece-a-day activity. Start by printing the pages you need. Cut off the top of the page that shows the whole poster, but keep the pages in the same order. It will be challenging to put the poster together if you mix them up. You’ll still have the original file so you can match the pieces to your digital file but it saves time to just keep the pages in order.
We also recommend that you keep the picture of the completed poster out of sight to prevent students from guessing early.
Create a space where the poster will be hung. Make sure it’s large enough depending on the orientation.
Each day, students will take turns colouring one piece each day. This can be done where one student colours one piece (like the special “colourer” of the day) or you can have several students each colour part of the piece. Trim the piece. Pin it (there’s a reason it’s just a pin at first) to the bulletin board. Sometimes the pieces get turned upside down, so we don’t put the first piece up with tape/staples unless we’re sure it’s the right direction.
Ask students to guess what the poster might be about.
This can be a fun way to introduce a new topic, or holiday or do a countdown. We used our End of the School Year poster during the last days of school so that the last piece was assembled on the last day. We gifted the finished poster to a student.
Make It a Collaborative Puzzle
We know we said we would share five ways, but one of our ninjas shared this method and we needed to add it in.
Print the pages you need. Cut the top off all the pages. Mix up the pages and hand out the pieces. Students colour their pieces and cut them out. If you have extra pieces, they can be finished by early finishers or extra people who work in the classroom.
The real fun comes when students have to assemble the pieces into the poster-without the labels and without your help. Students have to talk to each other and figure out how all the pieces go together. It helps with spatial awareness, communication and collaboration.
Try a Collaborative Poster for Free
We’ll send this simple collaborative poster to you when you sign up for our email list. It is also available in French (just follow the link to the French one). It’s available in our Resource Library if you’re already on the list.
How Do You Use Collaborative Posters?
We want to hear from you. How do you use collaborative posters in your classroom or school? Tell us in the comments below.

