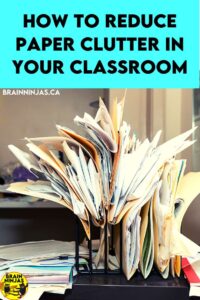
Is your classroom drowning in paper? It can happen so easily. Between student work, office memos, plans, reminders and reports, your classroom can easily become a fire hazard or, at the very least, a tree massacre.
Here are some of our best ways to reduce the amount of paper that keeps creeping into your classroom.
Photograph and Scan Student Work You Want to Keep

If you want to keep samples of student work, take the time to photograph or scan it. Properly label each photo and put documents in folders either on your computer or a cloud-based drive.
We often do this in a few different ways. Our school copier is equipped with a scanner, so we can easily run a set of pages through it and then email them to ourselves. We keep these samples organized on our computer (because we take the time to download the file and properly name it so it’s easy to find later).
We use an app called Evernote Scannable. It allows you to scan the document with your smartphone and then email it to yourself (and again, name and label it properly so you can find it later),
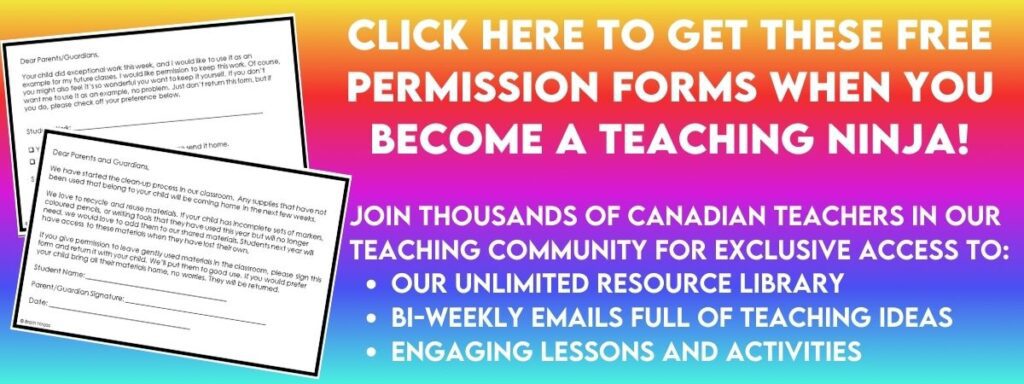
We also take photos of art projects. When we do this, we take LOTS of photos so we can use them as examples later. We even ask our parents for permission to do this. You can find a copy of the permission note we use in our Resource Library, or we can email it to you if you sign up for our email list.
Don’t Assign Paper Copies
We tend to assign paper copies because it’s a tangible thing we can use to assess, but what if you didn’t use a piece of paper for an assignment? You could use a digital document, voice recording, conversation, video or face-to-face interaction to use as an assessment. Organize these pieces of assessment in a similar way as photos using file names (student names work well) or concepts.
The key to using paperless assessment is to stay organized and on top of it.
There is also a little bit of fear of “proving” the student did the work worthy of a grade. If you take good notes in your grade book about how or why a student received the mark they did, then you should be good.
Rubrics take up a lot of paper, but if you print one copy of the rubric and then label it like a grid, you can use one class list and one rubric to assess your entire class. For example, one student might get a 4 under content. This row might called C, so in the grade book, next to the student’s name, you would write C4. Some teachers colour code or have a different system, but as long as it’s simple enough for you to use, then go for it.
Another way to use less paper is to practice using whiteboards, digital screens or, if you still have them, chalkboards. While this type of work is temporary, it’s perfect for formative assessments where you can check to see where your students stand.
Don’t Make Extra Copies
Try to just print or copy enough for your students. When students are absent, put their papers directly into books so they are already in place when the student returns. This cuts down on lost papers.
One year, we had a box in the back where we placed all the extra copies of papers. We were astounded at how much paper it added up to over the year.
If your school has a copy quota, this is a good way to trim that number down.
Send Work Home With Students
Why do teachers tend to hang on to things? Grade it and send it on its way.
This is why recording marks and staying on top of things is so important, but truth be told, not everything your students do at school is “graded” in the same way. Sometimes, you’re just checking that a student can do something and then you’re moving on.
If you feel like you need to keep something longer, take a photo or scan it so you can refer back to it later.
Convince Your School Administration to Go Paperless When Possible
Many schools now have websites, parent portals and other ways to communicate with parents digitally (like Seesaw or ClassDojo). Instead of sending home notes from school, try to use these paperless options when possible. We realize not all parents have equal access to these digital platforms, so just do your best to send home less paper communication.
Staff meetings can often be filled with useless papers (ok, not all are useless, but…). Our solution is a staff meeting binder. Every single paper we receive at any staff meeting goes directly into this binder.
Honestly, the majority of these papers are for reference only, so we asked our administration to scan these instead and send us the PDF file in an email. We saved a TONNE of paper this way.
Bye Bye Anchor Charts
We create our anchor charts with students while we are learning the things that will appear on the anchor chart, but once we’re finished with them, we photograph them and then recycle the paper.
That being said, if we feel students will need to review the chart regularly, we put a digital photo of the chart in our Google Classroom or rotate the charts on our bulletin boards.
Arrange Student Notes and Love Keepsakes Organized
Find a special box and make it your student love box. Ask students to put drawings and letters you write into it so they “don’t get lost” on your desk. Tell your students that their work is so special you want to take it home to share with your family.
Photograph the ones that you won’t keep forever and recycle the ones you don’t really need (at home so students don’t see them). Keep the really special ones in a scrapbook or special box and don’t forget to look through it from time to time.
Take Five Minutes Every Day
Use this time to get rid of the paper.
We have a “hand back” tub. We fill it with anything that needs to be handed back to students during the day. At the end of each school day, we hand out the items and students take them home or put them into their books.
We have a “mark this” bin where items that still need to be graded go. This bin often goes home to be graded there (but lots get put in the “hand back” rub first thing the next day.
We try to get rid of as many little pieces of paper as possible during this time.
Scrap Paper Can Be Your Friend
Encourage your students to salvage GOOS (Good On One Side) paper in a tub. It can be used for math scrap, drawing or pretty much anything else.
Throw Stuff Away
Whenever someone gives you a great lesson or binder full of things, scan what you can use and then throw it away. Chances are you aren’t going to use most of the items in there anyway, but at least this way, you aren’t hoarding the paper.
I guarantee you will find this file years later and still will not have used it.
Help Your Students Declutter
Not all students come with organization. Many need help learning this skill. Some students thrive on having an organized desk or binder. All of these students will pass through your classroom at some point.
Be very clear with your students about where each piece of paper will live.
We found that handing back student work by subject area was helpful. We would hand out everything for one book or binder and place everything inside all at once. When all the loose paper was put away, we would move on to the next subject.
At the beginning of the year, this process took forever, but the more we did it, the better it got.
We also had a strict policy to not have any loose papers in our desks. This is partly because we have flexible seating and the desks don’t always belong to the same students, but it also helped with keeping materials where they belonged. It cut down on the number of times students lost their work.
When we worked on projects with lots of little paper pieces, each student received a big envelope. We reused these envelopes year after year.
Shred Reports
Once your reports are on your school’s network and reports have gone home to students, get rid of them. You do not need to keep every draft of every report card you write. If something drastic happens to the report cards from previous semesters or terms, the IT department should be on the hook for that.
Check with your district about field trip forms and assessment documents. Many schools have storage rules for these items (but chances are the correct solution is NOT keeping them in your classroom or your home).
Box Up Last Year
If you are required to keep your grade and lesson books from year to year, keep them in a well-labelled box. Depending on the number of years you are required to keep your items, as you put in the newest year, shred the oldest year.
Label everything clearly with the years, as you probably won’t remember the names of the students in particular years after a while.
If you change schools, find out where you are supposed to keep these items. Most school boards store them and don’t want personal student information at your home.
Don’t Keep Everything
For student samples, pick just a few from each assignment. Keep a great one, an okay one, and a needs more work one. Again, this is why having this permission form is so handy.
Lessons change and your style of teaching will evolve. You don’t need a copy of every lesson that you’ve ever taught. Toss the ones that were lousy.
If paper and other items are a real problem for you, you might want to read our Clean the Clutter from Your Classroom Hoard post. It is a challenge to get rid of 1000 items!
Just Say No
When someone offers to share something they made with you, ask for a digital copy instead of a photocopy. Remember that copyrighted materials shouldn’t be shared anyway.
Don’t print emails.
Do not print schedules or calendars unless it’s going to last you for a few months.
Don’t print all your drafts. Try to print the one you’ll need instead of all the in-between versions of everything.
How is your paper problem? Are you able to manage it? Do you have other suggestions for paper management?
Are you looking for more tips on classroom organization?
- How to Get Your Classroom Set Up in One Day
- 5 Things to Get Organized Before the School Year Starts
- Get Your Emergency Sub Plans Ready
- 23 Ways to Clean the Clutter From Your Classroom Hoard
- Save Your Time And Be a Productive Teacher
- Avoid Device Disaster
- Prepare for Your Guided Reading Groups


